Thursday, November 10, 2011

Perfect Pumpkin Snickerdoodles


After my last cake pop endeavor, I still have a ginormous can of pureed pumpkin in my fridge with only 3/4 of a cup gone. So once again, I scoured TasteSpotting and found this fabulous recipe for Pumpkin Snickerdoodles. I love this recipe because Lori, from her blog Recipe Girl, presses the cookie balls down with a sugared glass so that when they bake, they aren't puffy. Genius. I am always disheartened when my Snickerdoodles don't come out flat, so I was ecstatic to try her idea. I adapted the recipe slightly and I love the way they turned out. Perfect for this crisp weather. However, I STILL have pumpkin left. If I don't use it within the week, it will quickly be forgotten until I find it months from now after trying to figure out where that "smell" is coming from. Any suggestions on how to use my remaining cup of pumpkin?


pumpkin snickerdoodles.

cookies.
1 cup (2 sticks) unsalted butter, at room temperature
1 cup granulated white sugar
1/2 cup light brown sugar
3/4 cup pure unsweetened pumpkin puree
1 large egg
2 teaspoons vanilla extract
3 cups all-purpose flour
1 1/2 teaspoons baking powder
1/2 teaspoon salt
1 teaspoon ground cinnamon

rolling sugar.
1/2 cup granulated white sugar
1 teaspoon ground cinnamon
1/2 teaspoon ground ginger
1/2 teaspoon allspice

1. Beat butter and sugars together in mixer with paddle attachment.
2. Add pumpkin, egg and vanilla and mix until combined.
3. Whisk flour through sugar in medium mixing bowl.
4. Add flour mixture to sugar mixture in segments. Mix until combined.
5. Cover dough and refrigerator for at least one hour until dough is firm.
6. Mix rolling sugar ingredients together and set aside.
8. Cover baking sheet in parchment paper or coat with cooking spray.
7. Preheat oven to 350 degrees F.
8. Remove dough from refrigerator. Roll into 2 inch balls and coat in sugar mixture. Place 2 inches apart on baking sheet.
9. Bake 12-14 minutes. (I varied mine between 10 and 15 and oddly enough, there didn't seem to be too much of a difference either way...so, I don't know. I guess do what you want, ha.)
Wednesday, November 9, 2011

Pumpkin Gingerbread Cake Pops


Every time I decide to browse through TasteSpotting, I am always baffled by the beautiful pictures and amazingly creative recipes selflessly donated by thousands of people all over the world. I know the internet clearly has it flaws, but I just find it fascinating how a simple necessity such as food can bring so many people together and we have the ability to do it from the comfort of our homes or offices or even libraries. That being said, I spent literally about 4 hours drooling over recipes and blogs found through TasteSpotting, when I came across Halley's blog, Blunder Construction, and this wonderful idea for Pumpkin Gingerbread cake balls. I adapted the recipe slightly and turned them into cake pops for my boyfriend's family reunion coming up. I've tried them and based on the results, I'm 100% sure they will be a huge hit!


pumpkin gingerbread cake pops.

cake.

2 cups flour
1 tablespoon ground ginger
1 teaspoon baking soda
1 teaspoon ground cinnamon
1/2 teaspoon ground allspice
1/2 teaspoon ground nutmeg
1/4 teaspoon salt
1 large egg
2/3 cup sugar
1 cup pumpkin puree
1/2 cup vegetable oil
1/2 cup unsulphured molasses
1/2 cup water
1/4 cup cream cheese frosting (I used store bought)

coating and pops.

1 Bag White Melting Chips (or White Melting Bark)
1/2 tsp vegetable oil
2 Graham Crackers crushed (for topping)
50-60 lollipop sticks (I prefer NOT to use the plastic ones, they slide off too easy)
Large block of craft flower foam

1. Preheat oven to 350 degrees F. Grease and flour a 9X13 inch baking pan.
2. Combine flour through salt in a mixing bowl. Set aside.
3. Beat egg, sugar and pumpkin in mixer with paddle attachment.
4. Add oil, molasses and water and continuing beating until thoroughly mixed.
5. Add flour mixture into wet ingredients in segments until fully incorporated.
6. Pour mixture into greased baking pan and bake for *25-45 minutes, until a toothpick comes out clean.
*Halley's recipe says 45 minutes but mine was finished in 25 minutes, so I would keep a close eye on it so it doesn't burn.
7. Using two forks, break up cake into crumbs. Transfer to a large mixing bowl.
8. Add Cream Cheese frosting and mix until thoroughly combined.
9. Form mixture into 1.5" balls and lay on baking sheet.
10. Melt a few of the white chocolate chips in the microwave for 30 sec to one minute.
11. Dip one end of the lollipop stick into the melted chocolate and then place in cake ball. Repeat for all of the balls. Let sit in refrigerator about 10 minutes or until the chocolate is set.
12. Melt the remaining chocolate in the microwave and coat each cake pop with the chocolate. Dip the top of each cake pop into the graham cracker crumbs.
13. Place each pop stick into the craft foam. Place foam in fridge and allow to set (about 20 minutes).

*For pictures on creating cake pops and for what a cake pop should NOT look like, read my other cake pop posts.
Thursday, August 11, 2011

Best Recipe 2011: S'Mores Cookie Bars.


Recently, my Dad got a fire pit from Costco, so at least once a week, it has been party at his house with of course...alcohol and s'mores. As of late, the weekly get-togethers have increased my love for 1. S'mores 2. My family 3. Alcohol....not necessarily in that order. So, summer life has been great this year and I will shortly be starting my first real nursing job (Yay!). In other news, Tim and I FINALLY bought a new camera so I no longer have to use my iPhone to take pictures of my wonderful baked goods. Anyway, I found this s'mores cookie bar recipe on the Hershey website. They have not just this amazing recipe, but so many others that I want to try out as well. I'm glad I tried this one though because it could be one of my favorite desserts ever. It tastes amazing right out of the oven and in my opinion even better once they are cool, but if you like them warm, you can always toss them in the microwave for a few seconds.


hershey's s'mores cookie bars.
1/2 cup (1 stick) butter
1 egg
1 1/3 cup flour *I put a little less flour and a little bit more graham cracker crumbs)
1 tsp baking powder
4 hershey's milk chocolate bars (or miniature, doesn't matter as long as they cover the pan)
3/4 cup sugar
1 tsp vanilla extract *(I used 2)
3/4 cup graham cracker crumbs *(I used about a cup and a little less flour)
1/4 tsp salt
1 cup marshmallow cream (aka marshmallow fluff)

1. Heat oven to 350 degrees. Grease an 8-inch square baking pan.
2. Beat butter and sugar in large bowl until light and fluffy.
3. Add egg and vanilla. Beat well.
4. Stir together graham cracker crumbs, flour, baking powder and salt. Add to butter/sugar mixture.
5. Press half of dough into prepared pan.
6. Arrange chocolate bars over dough.
7. Spread with marshmallow cream.
8. Scatter bits of remaining dough over marshmallow and press to spread. I flattened the dough in my hands first and then put in the pan and pieced the dough together. Its not really as hard as it seems.
9. Bake 30-35 minutes or until lightly browned.
10. Cut into bars.


Thursday, July 7, 2011

Taylor Swift decorated cupcakes!!


In honor of my (arguably slightly creepy) adoration of Taylor Swift and the recent concert I attended in Pittsburgh, I decided to make Taylor Swift decorated cupcakes.

The cupcakes were inspired by her most recent album "Speak Now". I admit that being 29 years old and being starstruck by Taylor Swift is slightly odd but A.) I can't help it B.) I am ecstatic that my nieces have a positive role model to look up to. I feel much better when they are running around singing "Love Story" instead of Katy Perry's "Let me see your pea
cock cock cock" (yes, they have sung this out loud in public). If you haven't had a chance to see a concert of hers, I would highly recommend forking out the dough for a ticket. It really was such an amazing concert. Taylor is stunning in person and despite her mishaps in a few music award shows where she sounded less than ideal live, she sang flawlessly. The concert was very theatrical with multiple costume changes, acrobatics and play-like skits for specific songs. Here is a shot from the sold out concert in Pittsburgh:


So anyway, the cupcakes were a huge hit with my boyfriend, nieces and sister. I made the decorations using ready-made fondant from Michaels. I have done fondant before but I was too lazy to make it myself. I was also too lazy to make mycupcakes from scratch so I used Pillsbury White Cake mix and Pillsbury Vanilla frosting. The tie-dye appearance was really cool if I do say so myself :). Enjoy!


taylor swift cupcakes.
1. Mix cupcake batter according to box directions. Any type of white cupcake batter will work.
2. Separate into 3 sections in separate bowls.
3. In one bowl add the desired amount of pink dye, in another bowl add the desired amount of purple dye, and leave the third bowl plain batter with no dye.
4. Add one spoonful of white batter to each cupcake paper.
5. Add one spoonful of purple batter on top of the white bat
ter (see below).


6. Add one spoonful of pink batter on top of the purple batter (see below).

7. Swirl the 3 colors together with a toothpick.

8. Thats it! Now just bake according to directions on the box and adore your beautiful results.
9. So from here out, you are on your own. I just used premade frosting from Pillsbury and added some food color. I also dyed the fondant and cut out fondant shapes using cookie cutters or my own non-artistic ability to cut out the numbers and letters.


Saturday, April 9, 2011

Nutella Gooey Butter Cake


So do you remember that post I wrote long ago called 'Dear South, What the Heck is Gooey Butter Cake'? I was so baking naive way back in April 2010 wasn't I? Well anyway, I found an upgrade. And while I'm a little upset to part with the original recipe because it was SO good, I had to venture and try this one I found using Nutella. If it involves Nutella, it's gotta be good. The original recipe came from Let's Dish. I kept everything the same except I didn't use Devil's Food Cake for the crust. I just used plain yellow cake mix. I thought the chocolate crust and the Nutella center might be a little too rich for me. Overall, it turned out really good but I think I actually like the original better. I don't know, what do you think?


nutella gooey butter cake.


crust.
1 package yellow cake mix
1 egg
8 tablespoons butter, melted

filling:
1 (8 oz.) package cream cheese, softened
1 cup Nutella (save yourself some time, this is about the contents of 1 13 oz jar)
3 eggs
1 teaspoon vanilla
8 tablespoons butter, melted
1 (16 oz.) box powdered sugar

  1. Preheat oven to 350 degrees F. Butter a 9x13 inch baking pan.
  2. Mix cake mix, butter and egg together until a light dough forms.
  3. Spread dough across bottom of prepared pan.
  4. Beat cream cheese until smooth.
  5. Add the eggs, vanilla and butter and beat together.
  6. Add powdered sugar and beat well.
  7. Spread over cake batter and bake for 40-50 minutes (mine took about 38 minutes). Center should not be quite set. Don't cook too long or its not gooey!


Sunday, April 3, 2011

Black Bottom - Chocolate Chip Cheesecake Cupcakes and Happy Birthday Mom!


So I finally had another free weekend where I've actually had a chance to bake something. I actually spent more time trying to figure out what I want to bake then I actually did baking. My baking time is so scarce these days that I end up wanting to bake everything that I see. As this weekend happened to land on my Mom's birthday, I geared my choice to her taste and ended up with Black Bottom cupcakes. I was really stoked about the way these ended up. They aren't very sweet, not the way you would imagine a chocolate cupcake and while it took me a hot second to get used to, I'm glad I didn't add more sugar because I think these are actually my favorite chocolate cupcakes. I used dark chocolate cocoa instead of dutch processed and I cut out some of the sugar. If you like your cupcakes sweet, I would actually add a little more sugar in addition to what I cut out. As an added bonus, they were surprisingly simple to make and of course, they were a huge hit with the fam.

Enjoy!


black bottom cupcakes:
Adapted from Baking Bites

cream cheese filling.
16-oz cream cheese, room temperature (I used 1/3 less fat)
1/2 cup sugar
1/4 tsp salt
2 large egg whites, room temperature
2 tbsp sour cream, room temperature (I used low fat)
1/3 cup miniature chocolate chips

chocolate cupcake.
1 1/2 cups all-purpose flour
1/2 cup Dutch-processed cocoa powder (I used Hershey's dark chocolate cocoa)
1 1/4 cups sugar (I only used 1 cup here. Again, you might want to add more if you prefer sweeter cake)
1/2 tsp salt
1 1/4 tsp baking soda
3/4 cup sour cream (low fat)
1 1/3 cups water
1/2 cup butter, melted and slightly cooled
1 tsp vanilla extract
(You know what's awesome? No eggs! Not that i have an issue with eggs but I'm pretty sure that is why these cupcakes were so dense and delicious)

1. Preheat oven to 350F. Line two 12-cup muffin tins with paper liners.

To make cream cheese filling:
2. Beat together cream cheese, sugar and salt until smooth.
3. Beat in egg whites and sour cream.
4. Stir in chocolate chips and set aside.

To make cupcakes:
5. In a large bowl, whisk together sugar, salt, flour, cocoa powder and baking soda.
6. Make a well in the center and add in sour cream, water, butter and vanilla.
7. Stir together until just combined and no streaks of flour remain.

8.Divide cake batter evenly among 24 cupcake liners.
9. Top each portion of batter with 1 rounded tablespoon cream cheese mixture (It is ok to have a little left over).
10. Bake for 20-25 minutes. A toothpick inserted into the side (cake only part) should come out with a few moist crumbs on it. **Rotate pans halfway through baking if you are using two racks.
11. Cool in pans for 5 minutes.** Cream cheese filling should sink slightly in this time.
12. Remove to wire racks to cool completely.

Sunday, March 20, 2011

Apple Streusel Bars


I've been on hiatus for quite some time now, I know, but nursing school has been consuming my life. Also, my apartment sucks and I have little to no kitchen. But what doesn't suck is shortbread crust, apples and cinnamon, streusal topping and sugary glaze. Hence: Apple Streusel Bars. I gave a batch to my boyfriend and his family and the other half to my classmate and her husband and got 0 back. I borrowed this recipe from Our Best Bites , however modified it just a bit (mostly because I didn't have what I was supposed to in my kitchen). Anyway, hope you like it!


apple streusel bars: crust.

2 c. flour
1/2 c. sugar
1/2 tsp. baking powder
1/2 tsp. salt
1 c. real butter, softened (I used 1/2 c. margarine and 1/2 c. butter because I actually ran out of butter...I wouldn't recommend this but...you gotta do what you gotta do)
1 egg, beaten

apple filling.
1/2 c. white sugar
1/4 c. flour
1 tsp. cinnamon (I used 1 TBSP...mmm cinnamon)
4 c. (about 3 medium) sliced, peeled baking apples (I used fiji)

glaze.
2 c. powdered sugar
About 3 Tbsp. milk (whole milk is best)
1 tsp. almond extract

1. Spray a 9×13 baking dish with non-stick cooking spray.
2. Preheat oven to 350 degrees F.
3. Prepare crust: mix flour, sugar, salt, and baking powder in a medium bowl.
4. Cut in butter with a pastry blender or two knives until you have pea-sized crumbles. Gently mix in beaten egg.
5. Gently pat about 2/3 of the crumb mixture onto the bottom of the dish and set aside.

6. Prepare apple filling: combine flour, sugar, and cin namon and toss with apples.
7. Spread apples out on prepared crust.
8. Sprinkle reserved crust mixture over apples evenly and bake in preheated oven for 40 minutes. When finished, allow to cool completely.

9. Prepare glaze: whisk together powdered sugar, almond extract, and enough milk to achieve desired consistency.
10. Place glaze in a Ziploc bag and cut off a very small portion of one of the corners.
11. Drizzle glaze over cooled pastry and allow to harden (you can place it in the freezer to hurry things along). Cut into bars and serve.


Tuesday, September 28, 2010

The Best Rice Krispy Treats - The Fruity Pebbles Kind


Well let me just warn you, this isn't going to be the most sophisticated of my baking posts but I'm not always the most sophisticated person I know either, so I decided to have it.  I have been making fruity pebbles treats for years now.  Do I like them BETTER than Rice Krispy treats? Eh...I mean...well, yes.  Basically, because they are colorful and they taste like candy, so I am definitely going to go with a yes on that one. I also ate the whole pan in about 3 days.  Anyway, the recipe is super simple.  It can be made in the microwave.  What's more to be said?

fruity pebbles treats.
6 cups Fruity Pebbles (don't use off brand, they taste weird)
1/4 cup (or 1/2 stick) butter, unsalted
1 package Kraft Marshmallows (I used the big ones but a marshmallow is a marshmallow so use the small ones if you want)


  1. Butter or cooking spray an 8 x 8 inch baking pan (you can use any size really, just form the treats to only use half the pan if you have a bigger pan)
  2. Melt butter and marshmallows together in a large bowl in the microwave for 4 minutes, removing half way through to stir.
  3. Add fruity pebbles and stir until fully incorporated
  4. Press into prepared pan with the back of a large spoon.
  5. Refrigerate for about 15 minutes and eat away (or eat them warm but they taste better chilled)
Friday, September 24, 2010

Homemade Apple Dumplings


I went to the York, PA fair 2 weeks ago (because I'm that cool), mainly just to get cotton candy because I'm slightly obsessed but also because maybe I wanted to win a golfish.  Low and behold, I got a goldfish and somehow killed it in less than a week.  RIP Nugget.  As brutally upset I am about the death of Nugget the Goldfish, I AM pretty excited about the fresh made Apple Dumpling I got for my mom.  I brought it to her while she was sitting there at her booth trying to sell water coolers and watched her eat the whole thing as I tried not to drool all over it.  I was trying to be "good" and not eat apple dumplings to keep my ass at a manageable size but that didn't last long because I was craving one so bad that I just decided to make my own apple dumpling when I got home.  This was basically my own recipe and I apologize for the absence of precise measurements but I was so ravenous for an apple dumpling that I just threw sweet stuff and cinnamon together without thinking much about it.

I made my own crust for the outside but I would probably recommend just buying pre-made pie dough.  My pie dough is fabulous in pies but it was a little to flaky for the dumpling I think.  It needs to have a little bit more of a chewy texture I think, which is generally what you get in a pre-made pie dough (plus its easier).  So anyway, I had a 9 inch pie dough which covered 2 apples and I had some extra left.  It probably could have covered 3 apples pretty nicely.

I used Macintosh Apples which actually worked out pretty well. You can probably use any tart baking apple but I think Granny Smith would be really good too.  Just don't use red delicious because they will collapse when you bake them.

home made apple dumplings.
2-3 medium sized apples (macintosh or granny smith, I used macintosh)
1 9-inch pie dough (I would recommend buying a pre-made or testing out your own recipe)
3 TBSP butter (unsalted, softened)
2 tsp of cinnamon (or more)
1/4 cup light brown sugar
1 Egg White
Turbinado or other large grained sugar for decoration
Cinnamon for decoration

  1. Preheat oven to 425 degrees F.
  2. Peel and core apples, set aside
  3. Combine butter, cinnamon and brown sugar.  Mix together thoroughly.  It will sort of look like big crumbs.
  4. Using a pizza cutter, cut dough into squares.  I'm not going to give you a size here because apples are different sizes, but ultimately, you want to be able to pull the 4 corners of the square up and meet them in the center of the top of the apple.
  5. Place dough squares in a greased casserole dish or on a baking sheet.
  6. Place cored apples, one each on each of the dough squares.
  7. Fill the center of each apple with the cinnamon/butter/sugar mixture.
  8. Pull the 4 corners of each square up over the top of the apples and pinch in the center.  Pinch the tops of the sides of dough that are sticking out to form a seem and press them lightly against the sides of the apple.
  9. Brush each apple with egg white and sprinkle with sugar and cinnamon.
  10. Bake apples for 10 minutes at 425 degrees or until golden brown.  
  11. Reduce oven heat to 400 degrees and bake for 20 minutes longer.
Cinnamon Sauce
1/4 cup brown sugar
3/4 cup water
2 tsp cornstarch dissolved in 2 tsp water
1 TBSP of cinnamon (or more, or less, ha)
  1. Combine brown sugar, water, starch and cinnamon in a small saucepan.  
  2. Bring to a boil at medium heat.  Reduce heat and let cook until desired thickness.
  3. Cover and keep warm.  
  4. Drizzle over apple dumplings after they are done baking. 


Thursday, August 19, 2010

Homemade Pop Tarts


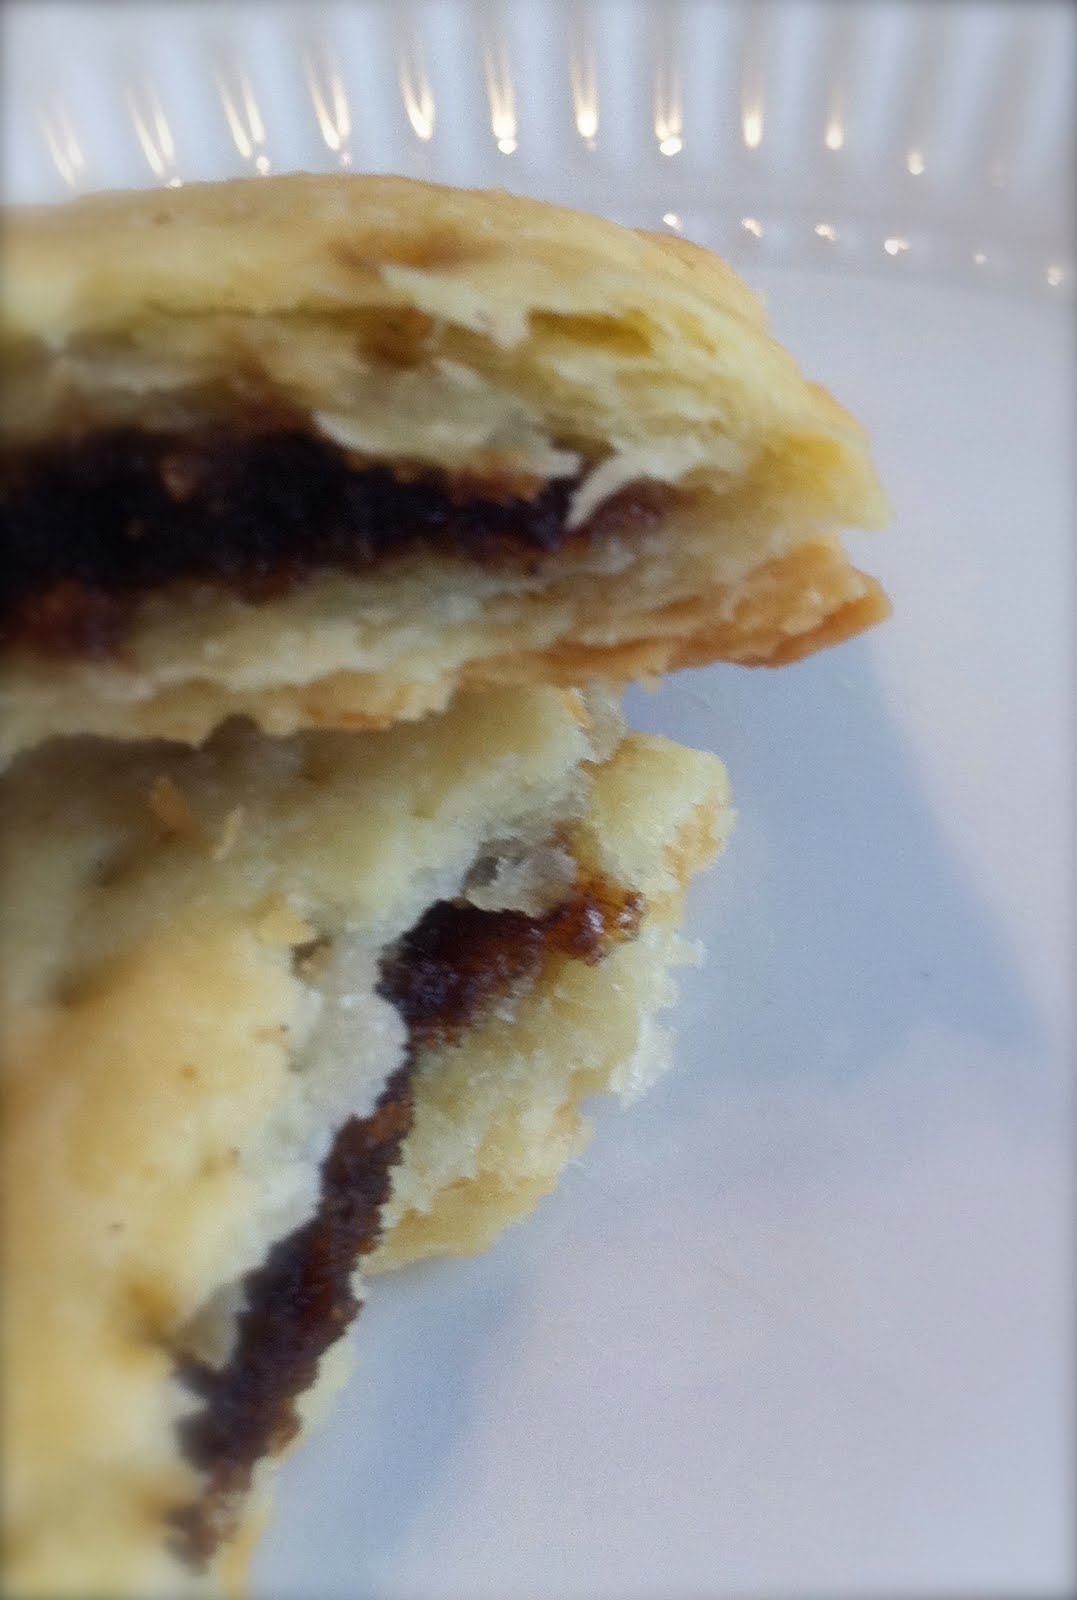
If you haven't heard, Kelloggs opened a Pop Tart store in Times Square of New York City.  This is exciting news. They are going to feature things like...Pop Tart "sushi".  I think that has something to do with pop-tart wrapped in a fruit roll-up? Anyway, it got me craving pop tarts and found this recipe for Homemade Pop Tarts on Smitten Kitchen website.


These turned out absolutely amazing.  I made cinnamon sugar pop tarts (my favorite) and Cherry pop tarts. They were a big hit with my family and boyfriend.  I would recommend eating them cold, I liked the pastry part a lot better when they were cold, but to each their own.  The pastry part was buttery and flaky and the center...well, that cinnamon sugar center sent me on a brief trip to heaven.

Homemade Pop Tarts

Pastry
2 cups (8 1/2 ounces) all-purpose flour
1 tablespoon sugar
1 teaspoon salt
1 cup (2 sticks or 8 ounces) unsalted butter, cut into pats
1 large egg
2 tablespoons (1 ounce) milk

1 additional large egg (to brush on pastry)

Cinnamon Filling (enough for 9 tarts)
1/2 cup (3 3/4 ounces) brown sugar
1 to 1 1/2 teaspoons ground cinnamon, to taste
4 teaspoons all-purpose flour
1 large egg, to brush on pastry before filling

Jam Filling
3/4 cup (8 ounces) jam
1 tablespoon cornstarch mixed with 1 tablespoon cold water


To make cinnamon filling: Whisk together the sugar, cinnamon, and flour.

To make jam filling:

1.) Mix the jam with the cornstarch/water in a small saucepan.
2.) Bring the mixture to a boil, and simmer, stirring, for 2 minutes.
3.) Remove from the heat, and set aside to cool. Use to fill the pastry tarts.

Make the dough:

1.) Whisk together the flour, sugar, and salt.

2.) Work in the butter with your fingers, pastry blender or food processor until pea-sized lumps of butter are still visible, and the mixture holds together when you squeeze it. If you’ve used a food processor, transfer the mixture to a large bowl. Whisk the first egg and milk together and stir them into the dough, mixing just until everything is cohesive, kneading briefly on a well-floured counter if necessary. *This is the easiest method, if you have a food processor, this dough will be made in no time.

3.)Divide the dough in half (approximately 8 1/4 ounces each), shape each half into a smooth rectangle, about 3×5 inches. You can roll this out immediately or wrap each half in plastic and refrigerate for up to 2 days.

Assemble the tarts:

1.) If the dough has been chilled, remove it from the refrigerator and allow it to soften and become workable, about 15 to 30 minutes.

2.) Place one piece on a lightly floured work surface, and roll it into a rectangle about 1/8″ thick, large enough that you can trim it to an even 9″ x 12″. [You can use a 9" x 13" pan, laid on top, as guidance.] Repeat with the second piece of dough. Set trimmings aside.

3.)Cut each piece of dough into thirds – you’ll form nine 3″ x 4″ rectangles.

4.) Beat the additional egg and brush it over the entire surface of the first dough. This will be the “inside” of the tart; the egg is to help glue the lid on.

5.) Place a heaping tablespoon of filling into the center of each rectangle, keeping a bare 1/2-inch perimeter around it.

6.) Place a second rectangle of dough atop the first, using your fingertips to press firmly around the pocket of filling, sealing the dough well on all sides.

7.)Press the tines of a fork all around the edge of the rectangle. Repeat with remaining tarts.

8.) Gently place the tarts on a lightly greased or parchment-lined baking sheet.

9.)  Prick the top of each tart multiple times with a fork; you want to make sure steam can escape, or the tarts will become billowy pillows rather than flat toaster pastries. Refrigerate the tarts (they don’t need to be covered) for 30 minutes, while you preheat your oven to 350°F.


Blog Template by YummyLolly.com