Tuesday, April 27, 2010

Dear South: What in the heck is gooey butter cake?

Gooey Butter Cake.  A food that most Yankees such as myself would raise their eyebrows and/or roll their eyeballs at you if you mentioned...what the heck is that? As I become more and more obsessed with food blogs I keep seeing this strange recipe.  I am not a Southern girl.  I was born and raised in Pennsylvania and haven't lived below northern Virginia.  I don't know too much about the South either but I do know this: every 'southern' food that I have ever tried has been indescribably amazing.  Its like...comfort food, even though I've never had it before.  Anyway, after seeing this recipe repeatedly on multiple blogs and then I saw it in a Paula Deen magazine and that was the last straw.  I had to try.  I really wanted to try this from 100% scratch but I forgot to take my butter out of the freezer so I had to cheat a little bit and use the recipe with the cake mix.  I will make this again from 100% scratch, I promise but this will have to do for now.  It is Paula Deen's recipe so I mean, I'm pretty sure it can't be bad.

gooey butter cake.
1 box of yellow cake mix (I used Duncan Hines white cake mix, I didn't have yellow)
1 egg (room temp of course)
8 tablespoons butter.


filling.
1 8 ounce package of cream cheese (softened)
2 eggs
1 tablespoon vanilla
8 tablespoons butter, melted
1 16 oz box of powdered sugar

  1.  Preheat oven to 350 degrees F.  Butter a 9x13 inch baking pan.
  2. Mix cake mix, butter and egg together until a light dough forms.
  3. Spread dough across bottom of prepared pan.
  4. Beat cream cheese until smooth.
  5. Add the eggs, vanilla and butter and beat together.
  6. Add powdered sugar and beat well.
  7. Spread over cake batter and bake for 40-50 minutes (mine took about 38 minutes).  Center should not be quite set.  Don't cook too long or its not gooey!


    Oh. Man.  This stuff is really. freaking. good.  I just tried my first piece.  I don't even know how to describe it.  Its like chewy on the bottom and gooey on the top.  Its like sugary, buttery, carmely, candy cake or something.  I think this is my new favorite dessert.  And the best part? It literally took me 10 minutes to throw this together.  I can't wait to try it completely from scratch, but for now...bring on the cake mix.   Just try it and you'll stop judging.


    Want to try more cake? Try the only carrot cake you will ever make again.  You won't be disappointed, I promise.
    Monday, April 26, 2010

    The Award Winning Baked Brownie


    So yet an another amazing recipe I run into out of my 'Baked' cookbook.  I have heard rumors of this particular brownie winning awards on Oprah among other shows I can't remember.  I am quite the brownie fanatic and when it comes to brownies...I don't mess around.  All I have to say now is that the 'Baked' boys were definitely not messing around when they created this brownie.


    the baked brownie.
    1 1/4 Cups all-purpose flour
    1 teaspoon salt
    2 tablespoons dark unsweetened cocoa powder
    11 ounces dark chocolate (60-72% cacao), coarsely chopped (I used chips..don't have to chop them)
    1 Cup (2 sticks) unsalted butter, cut into 1-inch pieces
    1 teaspoon instant espresso powder
    1 1/2   Cups granulated sugar
    1/2 cup firmly packed light brown sugar
    5 large eggs (room temp)
    2 teaspoons pure vanilla extract

    1. Preheat oven to 350 degrees F.  Butter the sides and bottom of a 9 by 13 inch glass or light colored metal baking pan.
    2. In a medium bowl, whisk the flour, salt, and cocoa powder together.
    3. Put the chocolate, butter, and instant espresso powder in a large bowl and set it over a saucepan of simmering water, stirring occasionally, until the chocolate and butter are completely melted and smooth.
    4. Turn off the heat, but keep the bowl over the water and add the sugars.  Whisk until completely combined, then remove the bowl from the pan.  The mixture should be room temperature.
    5. Add 3 eggs to the chocolate mixture and whisk until combined.  
    6. Add the remaining eggs and whisk until combined.  
    7. Add the vanilla and stir until combined.  Do not overbeat the batter here, unless you want cakey brownies...and who wants cakey brownies? Ew.
    8. Sprinkle the flour mixture over the chocolate mixture.  Using a spatula (not a whisk), fold the flour mixture into the chocolate until just a bit of the flour mixture is visible.
    9. Pour the batter into the prepared pan and smooth the top.  Bake in the center of the oven for 30 minutes, rotating the pan halfway through the baking time, until a toothpick inserted into the center of the brownies comes out with a few moist crumbs sticking to it.  Let the brownies cool completely. **
    10. Cut them into squares and serve. 
    11. Tightly covered with plastic wrap, the brownies keep at room temperature for up to 3 days.
    **  I didn't do this.  I was so stoked to try them that I had them warm.  They weren't very good, I don't know why, but they seemed cakey and I was super disappointed. Then I let them cool like I was supposed to and tried them again...a world of difference.  I just ate 3 of them before writing this post.  I probably just gained at least 4 pounds. 

    Like this 'Baked' recipe? Try Brewer's Blondies (with Whoppers!)
    Thursday, April 22, 2010

    leftovers: sour cream blueberry banana bread


    So I was really stoked to make angel food cake the past few days and just haven't been able to get around to it. My brother-in-law is in town, so I was hanging out with him, plus Glee was on last night and I was not going to miss that, not to mention I am taking 2 classes and working 11 hour days at my job, 13 hour days if you count my commute. Needless to say, while my life is passing by at record speeds, I've got almost rotting bananas, sour cream, and blueberries that are waiting to be baked into something delicious...hence, sour cream blueberry banana bread. Based on the circumstances, I think I am going to call it "my life is out of hand and I am about to have a minor meltdown bread"...heh, just kidding. I think I'm just tired.


    Needless to say, I did a Google search for all of the over ripe items in my fridge and found sour cream blueberry banana bread from a website called bakespace.com. The woman who posted the recipe said she got it from Cooks.com. There was no picture attached but the recipe sounded completely fine to me and I was determined to use up the ingredients I had So here it is, sour cream blueberry banana bread, pictures and all.

     sour cream blueberry banana bread.
    2 cups all purpose flour
    1 tsp baking soda
    1/2 tsp salt
    1/2 tsp ground cinnamon (I used 1 tsp...cinnamon is good.)
    1 cup buttered, softened
    3/4 cup sugar*
    2 large eggs
    1 cup mashed ripe bananas
    1/2 cup sour cream
    1 cup blueberries (fresh or frozen)
    1/2 cup pecans ( I omitted these, as I said before, I don't really like nuts in my food)

    *In hindsite, I would probably add a little bit more sugar.  The bananas made the bread sweet enough, but I prefer sweeter. 

    1. Preheat oven to 350 degrees F
    2. Grease and flour a 9x5" bread pan
    3. Cream butter and sugar with an electric mixer on medium-high speed until light and fluffy
    4. Add the eggs, banana, and sour cream.  Beat until well blended.
    5. Gradually beat in the flour mixture on low speed, until batter is smooth
    6. Fold in the blueberries and walnuts
    7. Bake for 1 hour*
    *My oven usually bakes things faster than what a recipe calls for, but I actually had this bake for 1 hour and 20 minutes.  I was so nervous that the top was going to be too well done but this bread is really heavy and the darker crust was a nice touch.  It was like a container for the moist delicousness inside. 


    Want more blueberry recipes? Try my Blueberry and Cream Cupcakes.
    Wednesday, April 21, 2010

    walnut streusal cinnamon swirl banana muffins.


    I know I am supposed to be transferring over my recipes from my other website that is now out of commission, but I had a bunch of over-ripe bananas lying around and I just had to get them out of my house.  So ladies and gentlemen, I bring you, the first recipe I have ever created on my own.  I will warn you, I am by no means a master baker nor am I creative for that matter, but I had this idea so I just went for it.  I was pretty impressed with the outcome.  These have more of a cupcake consistency than a muffin, honestly.  They are very light and fluffy for a muffin.  The dough was sticky, almost like it was about to be bread dough. . Oh and um...the measurements are a little off.  I had a lot of extra cinnamon and sugar mixture, and a lot of extra streusal, so you may want to adjust those down a little bit.


    streusal*.
    1/3 cup all purpose flour
    1/4 cup brown sugar
    1/4 cup rolled oats
    1/4 cup chopped walnuts toasted**
    1/2 teaspoon cinnamon
    4 tablespoons unsalted butter, melted

    Mix  all ingredients together using a fork or your hands.  That's it. Piece of cake. Piece of crumb cake. 


    *I call this streusel, honestly, I don't even know what streusel means, but I'm pretty sure this is it.  Please feel free to call me out if its not.
    **I really hate nuts.  But after biting the bullet and putting toasted walnuts in the Blondies I made (I will post that recipe soon...amazing), my life is changed for ever.  Please don't slide over this step and not toast them, it brings out a fabulous flavor. 

    cinnamon swirl.
    1/3 cup granulated sugar
    1 tablespoon sugar

    Mix sugar and cinnamon together; set aside. 

    muffins.
     3-4 bananas mashed (about 1 1/2 cups)1/2 cup (1 stick) butter, melted
    1 tablespoon lemon juice
    2 eggs, beaten
    1 1/2 cups sugar
    2 teaspoons vanilla
    2 cups flour
    1 1/2 teaspoons baking soda
    1/4 teaspoon salt 
    1 cup buttermilk

    1. Preheat oven to 350 degrees F
    2. Line a standard cupcake pan with papers
    3. Mix first 6 ingredients  (up to vanilla) together until well blended
    4. In a separate bowl, combine flour, baking soda and salt
    5. Beat in the flour mixture alternatively with the buttermilk, starting and ending with flour mixture
    6. Fill muffin papers 1/3 full of mixture
    7. Sprinkle cinnamon sugar in a layer over batter 
    8. Fill muffin papers the rest of the way (about 2/3 full) 
    9. Cover top of muffins with streusel.  Push it into the batter a little bit with your fingers, so it stays on when they rise.
    10. Bake 20-25 minutes (mine took 22)  - I only made 12, it would probably make about 18 otherwise*


    *I had some extra batter left so instead of  making more muffins, I opted to see how this would work as a bread/cake.  I greased a 9x5 inch bread pan and poured the batter in there and baked for about 40-45 minutes.  It came out beautifully.  I think this would honestly work best as a cake, but I guess it doesn't really matter, its all going to the same place in the end.

    Want more Cinnamon recipes? Try my Snickerdoodle recipe.

    cinnamon sugar snickerdoodle cookies.


    Snickerdoodles.  I’ve been dying to make these.  Apparently they are a common “childhood” favorite, however; I don’t believe they ever took part in mine.  But I mean, cinnamon and sugar coated sugar cookie (essentially), how can that turn out bad? Initially, I was a little disappointed in the outcome of these.  Maybe my expectations were set too high as I am sitting here on a Thursday night, 80 degrees in DC in the middle of April and raining...working on that silver lining, but I wasn’t thaat impressed, initially.  They did grow on me though.  Not sure I would use this recipe again for this cookie but I am now set out to find a perfect snickerdoodle cookie, no offense Martha Stewart.

    snickerdoodles.

    2 3/4 cups all-purpose flour
    2 tsp cream of tartar
         1 tsp baking soda
    1/4 tsp salt
    8 TBSP (1 stick) unsalted butter
    1/2 cup pure vegetable shortening (the solid stuff)
    1 3/4 cups sugar
    2 TBSP ground cinnamon
    2 large eggs

    1. Preheat oven to 400 degrees and line baking sheets with parchment paper*.
    2. Sift (or whisk) together flour, cream of tartar, salt, and baking soda; set aside.
    3. In the bowl of an electric mixer fitted with the paddle attachment, combine butter, shortening and 1 1/2 cups of sugar.
    4. Beat on medium speed until light and fluffy.
    5. Add eggs and beat to combine.
    6. Add dry ingredients and beat to combine.
    7. In a small bowl combine remaining 1/4 cup of sugar and cinnamon.  
    8. Use a small ice cream scoop** to form balls of dough and roll in cinnamon sugar. 
    9. Place about 2 inches apart on prepared baking sheet and bake for 10 minutes, rotating cookie sheets at 5 min***.


    10. Transfer to wire rack to cool.


    I used one batch with parchment paper and one without.  I had nonstick baking sheets and the parchment paper made no difference, just turned slightly crisp.  Which is fine, if thats how you like your parchment paper, not necessary though.

    ** Small ice cream scoop? I don’t even know what that means.  I used my fingers and got exactly 24 cookies which is what she got.  Guess I’m just good at sizing up balls...ha.

    *** I baked the first batch for 10 minutes and they burned.  The bottoms were actually black.  I baked the 2nd batch for 7 minutes and they weren’t black, but still pretty dark.  I imagine these could be done at 5-6 minutes depending on your oven, just keep an eyeball on them. 


    brewers blondies (made with whoppers!).

    As promised in my last post, I got blondies.   This is a post from my other page.  If you feel so inclined, it is really awesome.  Check it out at www.andreascakebatter.com.  Unfortunately, Apple can be slightly power hungry so when I used iWeb, I have to post it through mobile me or I can't have many of the features that are available everywhere else on the internet.  Don't get me wrong, I love my MacBook and my iPhone, an Apple junkie I am...but, they still piss me off.  Anyway, I'm done ranting.  My old post below and the best blondie recipe ever:


    So, I got a new cookbook this weekend and was so stoked to try it.  I’m sure you’ve heard of it, called “Baked: New Frontiers in Baking” by Matt Lewis and Renato Poliafito.  I have to say, my first impression is quite amazing.  They call these “Brewer’s Blondies” as originally they used brewer’s malt to make these, and then of course adapted to people who don’t have access to that.  These things...I mean, wow.  I brought them into work so that I wouldn’t eat the whole batch of them, and they were literally gone in 35 minutes. And I put them out at 9:35 am. When I made them, the dough was super thick! I almost though something was wrong with the dough, it was almost the consistency of cookie dough. I considered not putting the walnuts in because I usually don’t like nuts in my food but I’m really really glad I did.  Make sure you toast them first, they add an amazing flavor to the bars.  My only complaint if I had one, would be that they were really really greasy, but then again, can there ever really be too much butter. I think not. 


    blondies.
    2 1/3 cups all-purpose flour
    1 1/2 teaspoons baking powder
    1 teaspoon salt
    2 tablespoons malted milk powder
    14 tablespoonts unsalted butter, softened, cut into 1-inch cubes
    1 3/4 cups firmly packed dark brown sugar
    2 large eggs (room temp)
    2 teaspoons pure vanilla extract
    3/4 cup malted milk balls (UM..whoppers), coarsely chopped in a food processor*
    3/4 cup (9 oz) semisweet chocolate chips
    3/4 cup toasted walnuts, chopped **

    *Since I am an unfortunate fool with no food processor, I put the Whoppers in a freezer weight zip lock bag and mashed them with a meat tenderizer.  It worked fabulous; good aggression reliever too (which I tend to have a lot of).

    **I toasted mine in the oven at 350 for 5 minutes and they came out perfect

    1. Preheat oven to 350 degrees F. Butter the bottom and sides of a 9 by 13 inch baking pan.
    2. In a medium bowl, whisk the flour, baking powder, salt, and malted milk powder
    3. In the bowl of an electric mixer fitted with the paddle attachment, beat the butter and brown sugar on the medium speed until completely combined.  Scrape down the bowl, add the eggs and vanilla, and beat until combined. 
    4. Add the flour mixture in two batches and beat until just combined.
    5. Add the malted milk balls, chocolate chips, and walnuts and beat until just combined (about 10 seconds).  The mixture is really thick.  
    6. Turn the mixture out into the prepared pan and use and offset spatula to spread it evenly (Seriously use an offset spatula, the things are amazing, the batter doesn’t stick at all; super neat).
    7. Bake in the center of the oven for 25-30 minutes, or until a toothpick inserted into the center of the blondie comes out clean.
    baking...
     

    8.  Transfer to a wire rack and let cool for 20 minutes.  Try them warm. They are amazing! Reheat      them in the microwave for a few seconds after they cool, trust me, its worth your time.


    Monday, April 19, 2010

    the only carrot cake you will ever make again.

    First off, I apologize that I only have this really horrible picture to post up here.  I made this and only had time to take a picture on my iPhone (it was already 6 months late) and I didn’t even think about it until I was packaging an extra slice up for a coworker.  I promised my team lead at work that I would make her a carrot cake for her birthday.  That was in October.  I delivered the cake at the end of March.  I got this recipe from Ann Hodgman’s “Beat This” Cookbook.  It is my absolute favorite.  I have never made something from that book that was not amazing, carrot cake included. For whatever reason, the book is no longer in print but you can still buy it on Amazon.com.  Honestly, I don’t even like carrot cake.  Who wants carrots and cake? It defeats the purpose if you ask me.  But this cake was so incredibly delicious, I think I ate at least 1/4 of it, in addition to the the enormous amounts of batter, filling and frosting I shoved into my my face while making it.  Please try this, I guarantee, you will not be disappointed.


    pecan cream filling.
    *make this one day ahead of time

    1 1/2 cups sugar
    1/4 cup all-purpose flour
    3/4 tsp salt
    1 1/2 cup heavy cream
    3/4 cup (1 1/2 sticks) unsalted butter
    1 1/4 cup chopped pecans, lightly toasted
    2 tsp vanilla extract

    1. A day before the cake is made, blend sugar, flour, and salt in a heavy saucepan over low heat.
    2. Gradually stir in the cream.
    3. Add the butter
    4. Cook and stir the mixture over low heat until the butter has melted.
    5. Let simmer 20-30 minutes until golden brown, stirring occasionally*
    6. Remove from heat and cool to lukewarm.
    7. Stir in the pecans and vanilla.
    8. Refrigerate overnight
    9. Bring to room temperature before using.

    *The recipe says occasionally but it was moreso, stir constantly and you can take a break occasionally.  It clumped together on the bottom and sides if I let it sit without stirring.

    carrot cake.
    1 1/4 cups corn oil
    2 cups sugar (preferably superfine)*
    2 cups all-purpose flour
    2 tsp cinnamon
    2 tsp baking powder
    1 tsp baking soda
    1 tsp salt
    4 large eggs
    4 cups grated carrots (about 1 pound)**
    1 cup chopped pecans

    1. Preheat oven to 350 degrees F. 
    2. Generously butter and flour a 10-inch tube pan
    3. In a large bowl, whisk together the corn oil and the sugar
    4. In another bowl , sift together the flour, cinnamon, baking powder, baking soda and salt. 
    5. Sift half the dry ingredients into the oil-sugar, mixture and blend well.
    6. Sift the rest of the dry ingredients into the mixture.
    7. Add eggs one at a time, blending each before adding the next.
    8. Add carrots and pecans, mix until incorporated. 
    9. Pour the batter into the prepared tube pan; bake for 70 minutes, or until the cake begins to pull away from the sides of the pan.
    10. Cool upright, in the pan on a cooling rack.

    **I would highly highly highly recommend a food processor for grating the carrots.  I didn’t have one.  Needless to say, my night was spent grating carrots with a hand grater watching American Idol.

    icing.
    1 cup (2 sticks) unsalted butter, room temp
    8 oz cream cheese, room temp
    1 1-pound box (or bag) of confectioners’ sugar
    1 tsp vanilla extract
    pinch salt

    1. Cream together the butter and cream cheese until well blended and fluffy.
    2. Sift in the confectioners’ sugar; cream again.
    3. Beat in the vanilla and salt.
    4. If the icing is too soft to spread, chill it for a few minutes.  Refrigerate it if you don’t plan to use it right away, but bring it back to room temperature before using.

    assembling the cake.

    1. Run a spatula around the inside of the tube pan to loosen the cake.
    2. Invert the cake onto a serving plate.  With a long serrated knife, carefully split the cake into 3 horizontal layers*.
    3. Spread the pecan filling between the layers**.
    4. Frost the top and sides of the cake.

    *I was scared when I saw this step, but that is because I’m a novice.  It was actually not that bad.  I would just recommend waiting until the cake is completely cool...maybe a few hours.  I put small cuts around the first layer and then just connected them with my knife, pulled that layer off, set aside and then did the same with the next layer.  The layers are actually heavy and I didn’t let it cool completely so it was really hot inside when I pulled the layers away.
    ** Again, another reason to let the cake cool completely.  When I put the cake together, the filling sort of melted and then squished out the sides when I added the second layer and it did it even worse when I put the top on.  It all came together in the end but it would have been much better had I been patient and let the cake cool.  Patience is a virtue, patience is a virtue. 

    Sunday, April 18, 2010

    blueberries and cream cupcakes.


    So, I've had 2 bags of frozen blueberries in my freezer for the past couple of months and I am determined to get them out of there. I think my original intent was to make smoothies and then I realized that I don't really like blueberry smoothies...so what better way to use them than to make cupcakes?! I adapted this recipe from howtoeatacupcake.net. Her site is amazing by the way, check it out if you haven't already. My idea for the 'cream' in these cupcakes, believe it or not came from Strawberry Shortcake. My mom made it for Easter last night and it got me thinking about that doll from the 80's, you know, the tv show and those cute little dolls where their hair supposedly smelled like their names? Ah, the joys of being a child of the 80's.

    Okay, I just checked and the name is actually Blueberry Muffin, I thought her friend's name was Blueberries and Cream so my idea came from a figment of my imagination, neat. Anyway, enough chatter and onto the recipe:
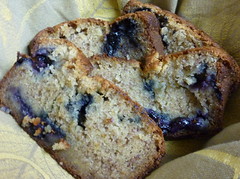
    blueberry muffins:
    1/2 cup unsalted butter (room temp)
    1 Cup Sugar
    1 tbsp canola oil*
    2 Eggs (room temp)
    1 1/2 Cups All Purpose Flour
    1 tsp baking powder
    1/2 tsp salt
    1/3 cup of milk.
    1 1/2 cups blueberries (fresh or frozen)
    2 tsp vanilla extract

    Preheat oven to 350 degrees.
    Line cupcakes pan with papers. With an electric mixer, cream butter and sugar and oil* together until light and fluffy (its okay to over beat here, if you are feeling up to it, beat away, now is the time).
    Add eggs one at a time until thoroughly incorporated into the butter/sugar mixture.
    Sift (I don't sift, I whisk and this works fine) flour, baking powder and salt in a separate bowl.
     Alternate adding flour mixture and and milk, beginning and ending with flour until fully mixed. This is where you do not want to over beat. As soon as the flour is mixed in, stop beating unless you want tough cupcakes (whatever that exactly means, I'm not sure but I don't want it to happen).
     Fill cupcakes liners 2/3 full and bake for about 18 minutes. The original recipe apparently says 22-24 minutes but howtoeatacupcake.net said hers took 18 minutes and mine did as well. I got 18 cupcakes. Let cool completely.

    *I add a tbsp of oil to all my cupcakes. I don't know why. For whatever reason, it gives me peace of mind. You don't have to do this and I'm not sure I ever have seen any recipe add oil to a butter cupcake. In my head, it keeps the cupcakes from coming out dry. I definitely could be making this up in my head, but I haven't had a dry cupcake since I started adding it.


    whipped cream filling (from food network)
    1 Cup heavy or whipping cream
    2 tsp confectioners sugar
    2 tsp pure vanilla paste or extract

    Chill the bowl that you will be mixing the ingredients in. Make sure cream is very cold.
    With a whisk*, or an electric mixer beat the cream and vanilla until loose peaks form. (If you lift up the beater, it should hold a "lazy curve".
    Add the sugar and mix until soft peaks form. Be sure not to over beat the cream or it will start to look lumpy (I think these are actually little chunks of butter forming).
     After cupcakes have cooled completely, either using the cone method (cut a cone shaped hole in the center of each cupcake and then slice the top of the cone off so you have sort of a lid) or using a cupcake injector tip, however you decide, get the cream into the center of the cupcake. Replace "lid" if you used the cone method.


    In hindsite, this whipped cream tasted terrible. It was almost bitter, like there was too much vanilla and not enough sugar. I kept adding more confectioners sugar (about 4-5 more tsp) until it tasted good to me. Also, the cone method was slightly stupid as it was a little bit messy (blueberries = messy). It wasn’t horrible but if you have one, maybe use the injector thing.

    *The original recipe says you can hand whisk this but I'm not sure I would recommend it. Call me lazy but I feel like my hand would fall off if I tried to make whip cream without a mixer.

    blueberry swiss meringue buttercream (from howtoeatacupcake.net)


    4 egg whites
    1 Cup granulated sugar
    1 Cup (2 sticks) unsalted butter, softened but cool
    1 cup of blueberry preserves
    2 tsp vanilla extract

    Put egg whites and sugar into the top of a double boiler over a pan of simmering water. Whisking constantly, cook until sugar has dissolved and mixture is hot (about 160 degrees).
    Pour heated egg whites into the bowl of an electric mixer fitted with the whisk attachment. Beat egg white mixture on high speed until it forms stiff peaks.
    Continue beating until fluffy and cooled, about 7* minutes.

    *For whatever reason, and pardon my language, but I had to beat the shit out of the egg whites and sugar until I got stiff peaks. I'm not sure if I did something wrong but it ended up beating for about 45 minutes on high until I got stiff peaks. If anybody has any idea why this happened, please feel free to let me know.

    While mixture is beating, bring the blueberry preserves to a simmer in a saucepan over medium-low heat, stirring constantly, for about 3 minutes.
    Strain the mixture through a fine-mesh sieve, pressing to extract as much liquid as possible. Discard the pulp.
    Set aside the blueberry liquid to cool to room temperature. Switch to the paddle attachment.
    With mixer on medium, add cool butter two tablespoons at a time, beating well after each addition.
     Increase speed to medium-high; continue beating until frosting appears thick, about 3 minutes.
    Reduce speed to low; add cooled blueberry liquid and vanilla extract and continue beating about 2 minutes to combine. If in doubt, just keep beating. She warns of this going through a "soupy curdled phase" which it really does but hang in there. It really does work in the end.

    These cupcakes, entailed a lot of work (not gonna lie) BUT, let me tell you, they are seriously amazing. Well worth the work.


    cookie dough, the beginning.

    Hi! Welcome to baking blog.  I would love to consider myself an all around culinary mastermind but I am afraid I cannot claim such a title.  Recently I acquired 3rd degree burns on my hand from trying to cook a steak in a frying pan...hot oil, hot pan, not a pretty picture.  So alas, I will stick to baking.  I have always loved to bake since I was a little girl, however; it has only been recently where I have used baking as an outlet, stress reliever, shoulder to cry on, best friend to celebrate with...just kidding.  I just simply enjoy it.  Hopefully as I move on, I can become better and eventually learn to pipe frosting...baby steps though.

    I did have an awesome website that I created through iweb, but alas it is extremely difficult to add comments boxes and all other kinds of widgets that can be on blogs, so I decided to just suck it up and go with the traditional way.  I'll be posting all of my current recipes over the next few dates and of course more to come as I continue bake my way along, but until then...what better way to start off a blog called "cookie dough", than with a chocolate chip cookie dough cupcake?


    chocolate chip cookie dough cupcakes.
    So, my oldest sister just recently found out that she is pregnant.  Being that she LOVES chocolate chip cookies, I decided to whip up something special for her for Easter.  Her exact words in response to them were, and I quote, “And this is why I love you...in that way.”  Granted, they were a little bit of work, but with a little bit of cheating, you can lighten your load a little bit and trust me...they are well worth it.  Enjoy.


     Brown Sugar Cupcakes
    3/4 cup (1-1/2 sticks) unsalted butter, room temperature
    3/4 cup light brown sugar
    2 large eggs, room temperature
     1-1/3 cups all-purpose flour
       1/2 teaspoon baking powder
        1/2 teaspoon baking soda
          1/8 teaspoon salt
             1/2 cup milk
             1 teaspoon vanilla
           2 TBSP canola oil (I added this to add moisture to the cupcakes)


    1. Make or buy chocolate chip cookie dough, roll into 1.5 inch balls, place on cookie sheet and let freeze for at least 1 hour.
    2. Preheat oven to 350 degrees
    3. Beat butter on high until soft, about 30 seconds.
    4. Add sugar. Beat on medium-high until light and fluffy, about 3 minutes.
    5. Add eggs one at a time, beat for 30 seconds after each.
    6. Whisk together flour, baking powder, baking soda, and salt in a bowl.
    7. Measure out milk and vanilla together.
    8. Add about a fourth of the flour to the butter/sugar mixture and beat to combine.
    9. Add about one third the milk/vanilla mixture and beat until combined.
    10. Repeat above, alternating flour and milk and ending with the flour mixture.
    11. Fill cupcake liners about 2/3 full and drop 1 frozen ball of cookie dough* into each.
    12. Bake for 20-22 minutes until golden and the cake springs back when lightly touched (mine took 18 minutes)

    *This is where the cheating helps.  I bought Pillsbury Dough Chocolate chip cookie dough.  The kind that are pre-cut into 24 pieces.  Just put them on a cookie sheet and throw them in the freezer.

                                Cookie Dough Frosting
                            1-3/4 cups confectioners sugar
                            1/2 cup unsalted butter, chilled
                                        1/8 teaspoon salt
                                1/2 teaspoon vanilla extract
                                        1 tablespoon milk
                             Eggless cookie dough (recipe below)


    1. In the bowl of an electric mixer fitted with the paddle attachment, combine 1-1/4 cups confectioners’ sugar, unsalted butter, salt, and vanilla, scraping down the sides of the bowl with a spatula as necessary.
    2. Add milk and continue mixing until well combined, scraping down the sides of the bowl with a spatula, as necessary. With the mixer running, slowly add remaining 1/2 cup confectioners sugar, mix until well combined.
    3. At this point you can mix in the eggless cookie dough.

                                 Eggless Cookie Dough
                                  1/4 cup butter, softened
                         1/4 cup brown sugar, plus 2 tablespoons
                                       2 teaspoons water
                                      1/2 teaspoon vanilla
                                             1/2 cup flour
                                          1/4 teaspoon salt
                             1/3 cup mini chocolate chips (optional)

    1. Cream the butter and brown sugar in a small bowl. Add water and vanilla and mix well.
    2. Add flour and salt and stir to combine. Stir in mini chocolate chips (optional). 
    3. Store in refrigerator until ready to use. 
     

    Blog Template by YummyLolly.com