Showing posts with label chocolate. Show all posts
Thursday, August 11, 2011

Best Recipe 2011: S'Mores Cookie Bars.


Recently, my Dad got a fire pit from Costco, so at least once a week, it has been party at his house with of course...alcohol and s'mores. As of late, the weekly get-togethers have increased my love for 1. S'mores 2. My family 3. Alcohol....not necessarily in that order. So, summer life has been great this year and I will shortly be starting my first real nursing job (Yay!). In other news, Tim and I FINALLY bought a new camera so I no longer have to use my iPhone to take pictures of my wonderful baked goods. Anyway, I found this s'mores cookie bar recipe on the Hershey website. They have not just this amazing recipe, but so many others that I want to try out as well. I'm glad I tried this one though because it could be one of my favorite desserts ever. It tastes amazing right out of the oven and in my opinion even better once they are cool, but if you like them warm, you can always toss them in the microwave for a few seconds.


hershey's s'mores cookie bars.
1/2 cup (1 stick) butter
1 egg
1 1/3 cup flour *I put a little less flour and a little bit more graham cracker crumbs)
1 tsp baking powder
4 hershey's milk chocolate bars (or miniature, doesn't matter as long as they cover the pan)
3/4 cup sugar
1 tsp vanilla extract *(I used 2)
3/4 cup graham cracker crumbs *(I used about a cup and a little less flour)
1/4 tsp salt
1 cup marshmallow cream (aka marshmallow fluff)

1. Heat oven to 350 degrees. Grease an 8-inch square baking pan.
2. Beat butter and sugar in large bowl until light and fluffy.
3. Add egg and vanilla. Beat well.
4. Stir together graham cracker crumbs, flour, baking powder and salt. Add to butter/sugar mixture.
5. Press half of dough into prepared pan.
6. Arrange chocolate bars over dough.
7. Spread with marshmallow cream.
8. Scatter bits of remaining dough over marshmallow and press to spread. I flattened the dough in my hands first and then put in the pan and pieced the dough together. Its not really as hard as it seems.
9. Bake 30-35 minutes or until lightly browned.
10. Cut into bars.


Saturday, April 9, 2011

Nutella Gooey Butter Cake


So do you remember that post I wrote long ago called 'Dear South, What the Heck is Gooey Butter Cake'? I was so baking naive way back in April 2010 wasn't I? Well anyway, I found an upgrade. And while I'm a little upset to part with the original recipe because it was SO good, I had to venture and try this one I found using Nutella. If it involves Nutella, it's gotta be good. The original recipe came from Let's Dish. I kept everything the same except I didn't use Devil's Food Cake for the crust. I just used plain yellow cake mix. I thought the chocolate crust and the Nutella center might be a little too rich for me. Overall, it turned out really good but I think I actually like the original better. I don't know, what do you think?


nutella gooey butter cake.


crust.
1 package yellow cake mix
1 egg
8 tablespoons butter, melted

filling:
1 (8 oz.) package cream cheese, softened
1 cup Nutella (save yourself some time, this is about the contents of 1 13 oz jar)
3 eggs
1 teaspoon vanilla
8 tablespoons butter, melted
1 (16 oz.) box powdered sugar

  1. Preheat oven to 350 degrees F. Butter a 9x13 inch baking pan.
  2. Mix cake mix, butter and egg together until a light dough forms.
  3. Spread dough across bottom of prepared pan.
  4. Beat cream cheese until smooth.
  5. Add the eggs, vanilla and butter and beat together.
  6. Add powdered sugar and beat well.
  7. Spread over cake batter and bake for 40-50 minutes (mine took about 38 minutes). Center should not be quite set. Don't cook too long or its not gooey!


Sunday, April 3, 2011

Black Bottom - Chocolate Chip Cheesecake Cupcakes and Happy Birthday Mom!


So I finally had another free weekend where I've actually had a chance to bake something. I actually spent more time trying to figure out what I want to bake then I actually did baking. My baking time is so scarce these days that I end up wanting to bake everything that I see. As this weekend happened to land on my Mom's birthday, I geared my choice to her taste and ended up with Black Bottom cupcakes. I was really stoked about the way these ended up. They aren't very sweet, not the way you would imagine a chocolate cupcake and while it took me a hot second to get used to, I'm glad I didn't add more sugar because I think these are actually my favorite chocolate cupcakes. I used dark chocolate cocoa instead of dutch processed and I cut out some of the sugar. If you like your cupcakes sweet, I would actually add a little more sugar in addition to what I cut out. As an added bonus, they were surprisingly simple to make and of course, they were a huge hit with the fam.

Enjoy!


black bottom cupcakes:
Adapted from Baking Bites

cream cheese filling.
16-oz cream cheese, room temperature (I used 1/3 less fat)
1/2 cup sugar
1/4 tsp salt
2 large egg whites, room temperature
2 tbsp sour cream, room temperature (I used low fat)
1/3 cup miniature chocolate chips

chocolate cupcake.
1 1/2 cups all-purpose flour
1/2 cup Dutch-processed cocoa powder (I used Hershey's dark chocolate cocoa)
1 1/4 cups sugar (I only used 1 cup here. Again, you might want to add more if you prefer sweeter cake)
1/2 tsp salt
1 1/4 tsp baking soda
3/4 cup sour cream (low fat)
1 1/3 cups water
1/2 cup butter, melted and slightly cooled
1 tsp vanilla extract
(You know what's awesome? No eggs! Not that i have an issue with eggs but I'm pretty sure that is why these cupcakes were so dense and delicious)

1. Preheat oven to 350F. Line two 12-cup muffin tins with paper liners.

To make cream cheese filling:
2. Beat together cream cheese, sugar and salt until smooth.
3. Beat in egg whites and sour cream.
4. Stir in chocolate chips and set aside.

To make cupcakes:
5. In a large bowl, whisk together sugar, salt, flour, cocoa powder and baking soda.
6. Make a well in the center and add in sour cream, water, butter and vanilla.
7. Stir together until just combined and no streaks of flour remain.

8.Divide cake batter evenly among 24 cupcake liners.
9. Top each portion of batter with 1 rounded tablespoon cream cheese mixture (It is ok to have a little left over).
10. Bake for 20-25 minutes. A toothpick inserted into the side (cake only part) should come out with a few moist crumbs on it. **Rotate pans halfway through baking if you are using two racks.
11. Cool in pans for 5 minutes.** Cream cheese filling should sink slightly in this time.
12. Remove to wire racks to cool completely.

Monday, May 24, 2010

The Best Chocolate Peanut Butter Pie Recipe...ever.


You know how in my last post I said that I was doing p90x and trying to eat healthier? Well, that's not working too well considering I ate 1/2 a peanut butter pie this week. Seriously, I couldn't help it.  I couldn't bring it into work because my supervisor has gestational diabetes and that would just be mean and there is no boy in my life at the moment, so what else was I supposed to do with it? I'm thinking maybe I should get rid of this 'Baked' cookbook because I can feel my ass growing exponentially with the number of recipes in the book that I conquer.  Here is yet another one.  The best peanut butter pie I ever had in my life.  And I'm not just saying that because I made it either.

Yep. Did that all on my own. Don't judge.


crust.
30 chocolate wafer cookies (about 6 ounces)*
1 tablespoon sugar
6 tablespoons unsalted butter, melted

*I used 1 sleeve of Oreo Cookies with the filling and all.  This was the best cookie crust I ever tasted.  
  1. In a food processor, grind the cookies to a very fine powder. You should have about 1 1/2 cups.
  2. Put the crumbs in a bowl and stir in the sugar (I didn't add sugar since there was cream in the Oreo's and I figured that was enough sugar).
  3. Pour the butter over the crumb mixture and mix until well combined.  The mixture will feel wet.
  4. Turn the crumb mixture out into a 9-inch pie plate and press it into the bottom and up the sides.  You can use the back of a large spoon to even out the crust.
  5. Put the crust in the refrigerator while you make the filling.

peanut butter filling and chocolate bottom.
1/2 (3 oz) semisweet chocolate chips
1/2 teaspoon light corn syrup
8 oz cream cheese, at room temp*
1 cup creamy peanut butter*
2 tablespoons pure vanilla extract
3/4 cup firmly packed dark brown sugar
1 1/2 cups heavy cream

*I used l/3 less fat cream cheese and low fat peanut butter because that was all I had.  It was still the best peanut butter pie I've ever had in my life but I mean, I'd say, go for the full fat and it might be even better (if that's possible).  I mean, you're putting 1 1/2 cups of heavy cream (which I would not skimp on, don' think the texture would be the same if you used a lighter cream) so...there goes all hopes of a "lighter" pie. 
  1. Melt the chocolate chips in a microwave oven or in a double boiler (I just melted them in the microwave for about 2 minutes, checking every 30 seconds of course, and that worked just fine and much easier than a double boiler).
  2. Add the corn sytrup and stir to combine (This was so weird, it stuck together like dough.  You could roll it out with a rolling pin.  I would recommend actually doing this before the next step.  Try to shape it a little bit to fit the bottom of the pie pan because if you spread when you get it in the pan, its really easy to break the crust)
  3. Use a spatula to spread the chocolate in a thin layer on the bottom of the chilled pie crust.  Put the crust back in the refrigerator while you make the peanut butter filling.
  4. Put the cream cheese, peanut butter, vanilla, and brown sugar in teh bolw of an electric mixture fitted iwth the paddle attachment.  
  5. Beat on medium speed until well combined and completely smoooth.  Set aside.
  6. In a clean bowl, use the mixture fitted with the whisk attachment to whip the cream until soft peaks form. 
  7. Remove from the bowl from the mixer and with a rubber spatula, gently fold the whipped cream into the peanut butter mixture until the mixture is uniform in color. 
  8. Pour the mixture into the prepared curst and freeze for at least 4 hours. Once the pie is frozen, you can cover it with aluminum foil and freeze for up to 3 days. 

easy hot fudge sauce.*
6 oz milk chocolate, finely chopped
6 oz dark chocolate (64% cacao), finely chopped
1 cup heavy cream
1/4 cup light corn syrup

*I didn't make the hot fudge sauce but I put it in here since the Baked boys had it in the book and it sounds amazing. I'd love to know how it turns out though if anybody tries it.  I wasn't planning on serving this to anybody really and I REALLY didn't need hot fudge sauce sitting around my house.  I'm sure it tastes phenomenal though. 
  1. Place both chocolates in a medium heatproof bowl and set aside. 
  2. In a small saucepan, bring the cream to a simmer over medium heat. Add the corn sytrup and stir to combine. 
  3. Remove from the heat and pour over the chocolates.  Let the mixture sit for 2 minutes. 
  4. Starting in the center of the bowl and working your way out to the edges, whisk the chocolate mixture in a circle until completely smooth.  
  5. Cool to room temperature and cover tightly and this sauce will keep for 3 days in the refrigerator. 
  6. Rewarm the sauce ina  microwave oven on medium heat for 30 seconds, stir, and repeat until the sauce is warm; or reheat it in a small saucepan over low heat. 
  7. Place frozen piece of pie on a large serving plate and spoon 3 heaping tablespoons of the warm sauce directly over the top of the pie. Eat. Enjoy. 

Sunday, May 9, 2010

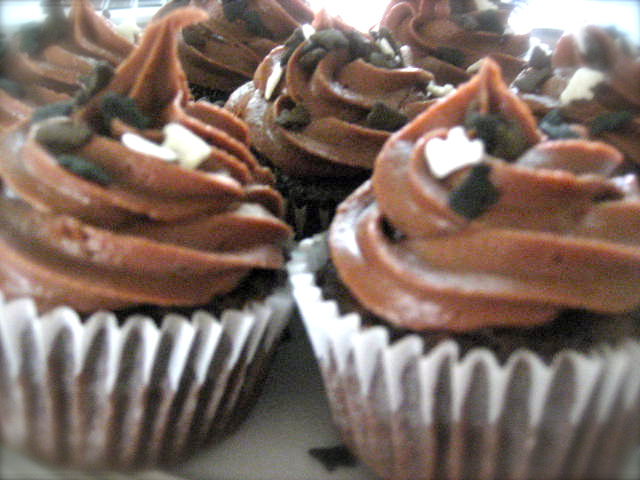
Cupcakes! Chocolate and Vanilla Root Beer Float Cupcakes, AKA Black and Brown Cows


I never thought I'd be saying this, but I love going back to my hometown of Lancaster, Pennsylvania for of course my family, but also because it is so so cheap compared to D.C.  I'm talking about groceries here (um...and food and clothes taxes and rent).  We have discount grocery stores that have the most random things, like for example, these cute little white, brown and black cow sprinkles.  I immediately had to have them when I saw them and the first thing I thought of was black and brown cows.  Now, I'm not THAT old but black and brown cows were simply root beer floats with either vanilla or chocolate ice cream and I think the name originated in the 60s or 70s.  Okay, I'm kind of making that up but I first heard it called that in the movie 'Now and Then' (love that movie) which was set back in 1970.  Regardless, if we can have chocolate and vanilla root beer floats, then of course we can have chocolate and vanilla rootbeer cupcakes.

Hence, I bring you Black and Brown Cow Cupcakes; idea by me, sort of.

Root Beer Cupcakes (This came from my 'Baked' book's Root Beer Bundt Cake recipe)*
(makes 24 cupcakes)

2 cups root beer (not diet!)
1 cup dark unsweetened cocoa powder
1/2 cup (1 stick) unsalted butter, cut into 1-inch pieces
1 1/4 cup granulated sugar
1/2 cup firmly packed dark brown sugar
2 cups all-purpose flour
1 1/4 teaspoons baking soda
1 teaspoon salt
2 large eggs


  1. Preheat oven to 325 degrees F.  Fill cupcake pan(s) with liners.
  2. In a small saucepan, heat the root beer, cocoa powder, and butter over medium heat until the butter is melted.  Add the sugars and whisk until dissolved.  Remove from heat and let cool.
  3. In a large bowl, whisk the flour, baking soda and salt together. 
  4. In a small bowl, whisk the eggs until just beaten, then whisk them into the cooled cocoa mixture until combined. 
  5. Gently fold the flour mixture into the cocoa mixture*.  The mixture will be slightly lumpy - do not overbeat, as it could cause the cake to be tough.
  6. Pour the batter into the prepared cupcake pan, filling each cup about 2/3 full.
  7. Bake for 20-25 minutes or until a small, sharp knife comes out clean.  
  8. Let cool completely before frosting.


*I don't really think this tasted like root beer at all.  However; the consensus among my friends was that you could taste a hint of root beer.  I could be bias because  I was eating cake batter and drinking root beer and then tasting the cupcakes but I didn't taste root beer at all, but I will say, I think this is my favorite chocolate cupcake recipe from now on.  The cupcakes were really moist and the chocolate flavor was really rich. 


Whipped Cream Filling (more like pastry cream):
2 teaspoon warm water
dash of salt
1 3/4 cups marshmallow fluff
1/2 cup shortening
1/2 teaspoon vanilla
1/2 cup confectioners sugar*

2 teaspoon warm water
a couple dashes of salt

  1. Beat first 4 ingredients together with a stand or electric mixer until fluffy
  2. Dissolve salt in warm water and add to marshmallow mixture**
  3. Beat on high speed about 1 minute longer
* I'm really sorry but I'm not actually positive it was 1/2 cup powdered sugar.  I just kept adding it until I thought the texture/taste was right.  I start with about 1/2 cup, maybe a little less. Beat, add the salt mixture and then add more sugar if needed. 
**Make sure to add only had 1 or 2 dashes of salt.  I put too much salt in the first time and it tasted horrible so I had to remake it.  

Vanilla Buttercream Frosting (from How to Eat a Cupcake)- recipe halved
1 cup shortening
4 cups confectioners sugar
1/4 teaspoon salt
1 teaspoons vanilla
3 fluid ounces heavy cream
  1. Cream shortening until fluffy.
  2. Add confectioners sugar and cream until blended.
  3. Add salt, vanilla, and cream.  Beat on low speed until moistened.  Add additional cream until desired consistency if necessary.
  4. Beat at high speed until frosting is fluffy.
I did something wrong when I made this frosting. I'm not sure what though (LOL).  It was too heavy or something because when I piped it onto the cupcake, it just collapsed and ran down the sides; but when I made it again (below) with the chocolate, it turned out great.  I must have just not been paying attention or zoning out or something.  Anyway, I ended up throwing away the vanilla frosted cupcakes (all except 2), they tasted good but were a huge mess.

Chocolate Butter Cream*
*I just created the recipe above, again.  But I replaced 1/3 cup of confectioners sugar with 1/3 cup unsweetened cocoa.


Overall, I really liked the concept here, however; it didn't turn out quite the way I imagined...which was these beautiful chocolate and vanilla frosted cupcakes that tasted exactly like root beer floats and looked amazingly cute with the little cow sprinkles.  They moreso just tasted like chocolate cupcakes with frosting and cream filled centers. And by the time I got them to my friend's house in Fredricksburg, they icing had melted and was dripping down the sides of the cupcake papers. My friends enjoyed them, however; they said they were ridiculously sweet and one "passed out on the car ride home from being in a sugar coma". Hahaha. For what they turned out to be, it was a lot of work and I probably won't make these ever again.  So how now brown cow?
Saturday, May 8, 2010

Chocolate: Mother's Day Chocolate Mint Oreo Truffles


I know, I know, its not Mother's day yet but I wanted to post this truffle recipe in case anybody felt like making Oreo truffles for their Mom for Mother's Day.  Chocolate Mint Truffles.  The name sounds so difficult but they are ridiculously easy.  I only have one picture to post so far but I will get more up when I am finished. I am actually in the process of making them right now.  I made a couple of truffles last night after I mixed the batter but I got too tired. Hence, my 1 sucky picture.


Speaking of, the last few posts my pictures have kind of sucked.  It is probably going to be like that for a while.  My brand new camera wouldn't turn on last week so I had to send it back to Amazon...so annoying.  So I had been using my Canon Elf which was taking horrible pictures and then, I got rid of my iPhone because apple ticked me off and I have actually been using the camera on my new blackberry.  I hate this Blackberry but the pictures it takes are actually better than my old camera, how crazy is that! My last few posts with the Guacamole and Cucumber Mint Cooler and Pita chips, they were all taken with my blackberry camera.  Crazy.


Anyway, here is a great mother's day gift, super easy and insanely good. The recipe is all over the internet so I have no idea where it actually originated from.  People have used Strawberry Oreo's, and Regular Oreo's.  You can cover them with various colors of chocolate, or white chocolate and decorate them however you want.  Time to be creative.  I got away easy because my Mom hates white chocolate, so I kept mine simple and covered them with dark chocolate (60% Cacao) and threw on a few sprinkles for decoration.  Enjoy!


oreo truffles.
1 package Oreo cookies (any flavor, I used mint)
1 8 oz package cream cheese, softened*
chocolate chips or bark chocolate or melting wafers (for coating)
sprinkles, oreo cookie crumbs, mini m&ms or anything else you might want to use to decorate

*If you don't have time to let your cream cheese soften at room temperature, put it in the microwave for 10 second increments.  It should soften pretty quickly.


  1. Grind Oreos into fine crumbs in a food processor (set some aside for sprinkling on top if you wish)
  2. Add cream cheese and mix until combined.  Dough should come together in one big lump.  It will feel greasy and won't stick to your hands when you touch it.
  3. Roll into balls about a size of a quarter.  I made mine much bigger and I think they are too big, but whatever, they still taste good. 
  4. Chill for about 45 minutes in the fridge (less time if you put them in the freezer), until they are solid.
  5. Melt chocolate in a small but deep bowl* the microwave, taking out to stir every 30 seconds.  Or if you got the melting chocolates, melt them according to the directions on the package.
  6. Roll balls in melted chocolate until they are completely coated.  Pull them out with a fork or slotted spoon and place them on a parchment paper lined cookie sheet.  At this point you can put sprinkles or cookie crumbs on them or any other type of decoration. Let chill until chocolate is completely set.
*This is just something I came across when I was trying them last night.  I used a shallow bowl and it was kind of annoying to have to roll them all over the place just to get them coated.  I imagine it would be much easier if the bowl was deep and narrow and you could just plop them in there and pull them out. 

**I also tried this variation with a couple of them.  I saw Bakerella did this with her cake bites and I think it will work here too.  She shaped some into the shape of a hershey kiss.  After the chocolate set, she wrapped them in tin foil and made messages in strips on her computer and created a large Hershey kiss.  How cute is that! I tried it with a couple, I will let you know how they turn out.

*I told you I'd let you know how the kiss truffles turn out.  Heh.  Well, not good enough to post a picture.  I think I need some practice with the kisses. I will work on those for next time.  


Sunday, May 2, 2010

Mint Chocolate Angel Food Cake


I finally got a chance to appease my angel food cake craving this weekend.  I probably could have made it prettier but I was feeling slightly lazy, however; I did put my own twist on it and made mint chocolate angel food cake.  The best part about this recipe is that it tastes amazing and there is no butter in it! Imagine that.  Egg whites and sugar...that means there are no calories correct? Correct.  Anyway, here it is, my own recipe:

mint chocolate angel food cake.
2/3 cup cake flour
1/3 cup unsweetened cocoa
1 1/2 cups super fine sugar
12 egg whites (room temp)
1/3 cup warm water
1 1/2 teaspoons cream of tartar
1 tsp peppermint extract

  1. Preheat oven to 350 degrees F.
  2. In a medium mixing bowl, combine the cake flour, cocoa, the salt and 1/2 of the sugar.
  3. In the bowl of an electric mixer, combine egg whites, extract, water and cream of tartar on medium speed.  
  4. Add the sugar to the mixture that had not yet been combined with the flour mixture and continue to beat until medium peaks form. 


5.  Sprinkle flour mixture over the top of the egg white mixture and fold in with a spatula.  Continue to  do this with the rest of the flour mixture until it is completely incorporated.
6. Pour batter into a 10" tube pan and bake for 30-35 minutes.
7. Let cool upside down on a cooling rack for at least one hour before removing from pan.


Blog Template by YummyLolly.com