Tuesday, September 28, 2010

The Best Rice Krispy Treats - The Fruity Pebbles Kind


Well let me just warn you, this isn't going to be the most sophisticated of my baking posts but I'm not always the most sophisticated person I know either, so I decided to have it.  I have been making fruity pebbles treats for years now.  Do I like them BETTER than Rice Krispy treats? Eh...I mean...well, yes.  Basically, because they are colorful and they taste like candy, so I am definitely going to go with a yes on that one. I also ate the whole pan in about 3 days.  Anyway, the recipe is super simple.  It can be made in the microwave.  What's more to be said?

fruity pebbles treats.
6 cups Fruity Pebbles (don't use off brand, they taste weird)
1/4 cup (or 1/2 stick) butter, unsalted
1 package Kraft Marshmallows (I used the big ones but a marshmallow is a marshmallow so use the small ones if you want)


  1. Butter or cooking spray an 8 x 8 inch baking pan (you can use any size really, just form the treats to only use half the pan if you have a bigger pan)
  2. Melt butter and marshmallows together in a large bowl in the microwave for 4 minutes, removing half way through to stir.
  3. Add fruity pebbles and stir until fully incorporated
  4. Press into prepared pan with the back of a large spoon.
  5. Refrigerate for about 15 minutes and eat away (or eat them warm but they taste better chilled)
Friday, September 24, 2010

Homemade Apple Dumplings


I went to the York, PA fair 2 weeks ago (because I'm that cool), mainly just to get cotton candy because I'm slightly obsessed but also because maybe I wanted to win a golfish.  Low and behold, I got a goldfish and somehow killed it in less than a week.  RIP Nugget.  As brutally upset I am about the death of Nugget the Goldfish, I AM pretty excited about the fresh made Apple Dumpling I got for my mom.  I brought it to her while she was sitting there at her booth trying to sell water coolers and watched her eat the whole thing as I tried not to drool all over it.  I was trying to be "good" and not eat apple dumplings to keep my ass at a manageable size but that didn't last long because I was craving one so bad that I just decided to make my own apple dumpling when I got home.  This was basically my own recipe and I apologize for the absence of precise measurements but I was so ravenous for an apple dumpling that I just threw sweet stuff and cinnamon together without thinking much about it.

I made my own crust for the outside but I would probably recommend just buying pre-made pie dough.  My pie dough is fabulous in pies but it was a little to flaky for the dumpling I think.  It needs to have a little bit more of a chewy texture I think, which is generally what you get in a pre-made pie dough (plus its easier).  So anyway, I had a 9 inch pie dough which covered 2 apples and I had some extra left.  It probably could have covered 3 apples pretty nicely.

I used Macintosh Apples which actually worked out pretty well. You can probably use any tart baking apple but I think Granny Smith would be really good too.  Just don't use red delicious because they will collapse when you bake them.

home made apple dumplings.
2-3 medium sized apples (macintosh or granny smith, I used macintosh)
1 9-inch pie dough (I would recommend buying a pre-made or testing out your own recipe)
3 TBSP butter (unsalted, softened)
2 tsp of cinnamon (or more)
1/4 cup light brown sugar
1 Egg White
Turbinado or other large grained sugar for decoration
Cinnamon for decoration

  1. Preheat oven to 425 degrees F.
  2. Peel and core apples, set aside
  3. Combine butter, cinnamon and brown sugar.  Mix together thoroughly.  It will sort of look like big crumbs.
  4. Using a pizza cutter, cut dough into squares.  I'm not going to give you a size here because apples are different sizes, but ultimately, you want to be able to pull the 4 corners of the square up and meet them in the center of the top of the apple.
  5. Place dough squares in a greased casserole dish or on a baking sheet.
  6. Place cored apples, one each on each of the dough squares.
  7. Fill the center of each apple with the cinnamon/butter/sugar mixture.
  8. Pull the 4 corners of each square up over the top of the apples and pinch in the center.  Pinch the tops of the sides of dough that are sticking out to form a seem and press them lightly against the sides of the apple.
  9. Brush each apple with egg white and sprinkle with sugar and cinnamon.
  10. Bake apples for 10 minutes at 425 degrees or until golden brown.  
  11. Reduce oven heat to 400 degrees and bake for 20 minutes longer.
Cinnamon Sauce
1/4 cup brown sugar
3/4 cup water
2 tsp cornstarch dissolved in 2 tsp water
1 TBSP of cinnamon (or more, or less, ha)
  1. Combine brown sugar, water, starch and cinnamon in a small saucepan.  
  2. Bring to a boil at medium heat.  Reduce heat and let cook until desired thickness.
  3. Cover and keep warm.  
  4. Drizzle over apple dumplings after they are done baking. 


Thursday, August 19, 2010

Homemade Pop Tarts


If you haven't heard, Kelloggs opened a Pop Tart store in Times Square of New York City.  This is exciting news. They are going to feature things like...Pop Tart "sushi".  I think that has something to do with pop-tart wrapped in a fruit roll-up? Anyway, it got me craving pop tarts and found this recipe for Homemade Pop Tarts on Smitten Kitchen website.


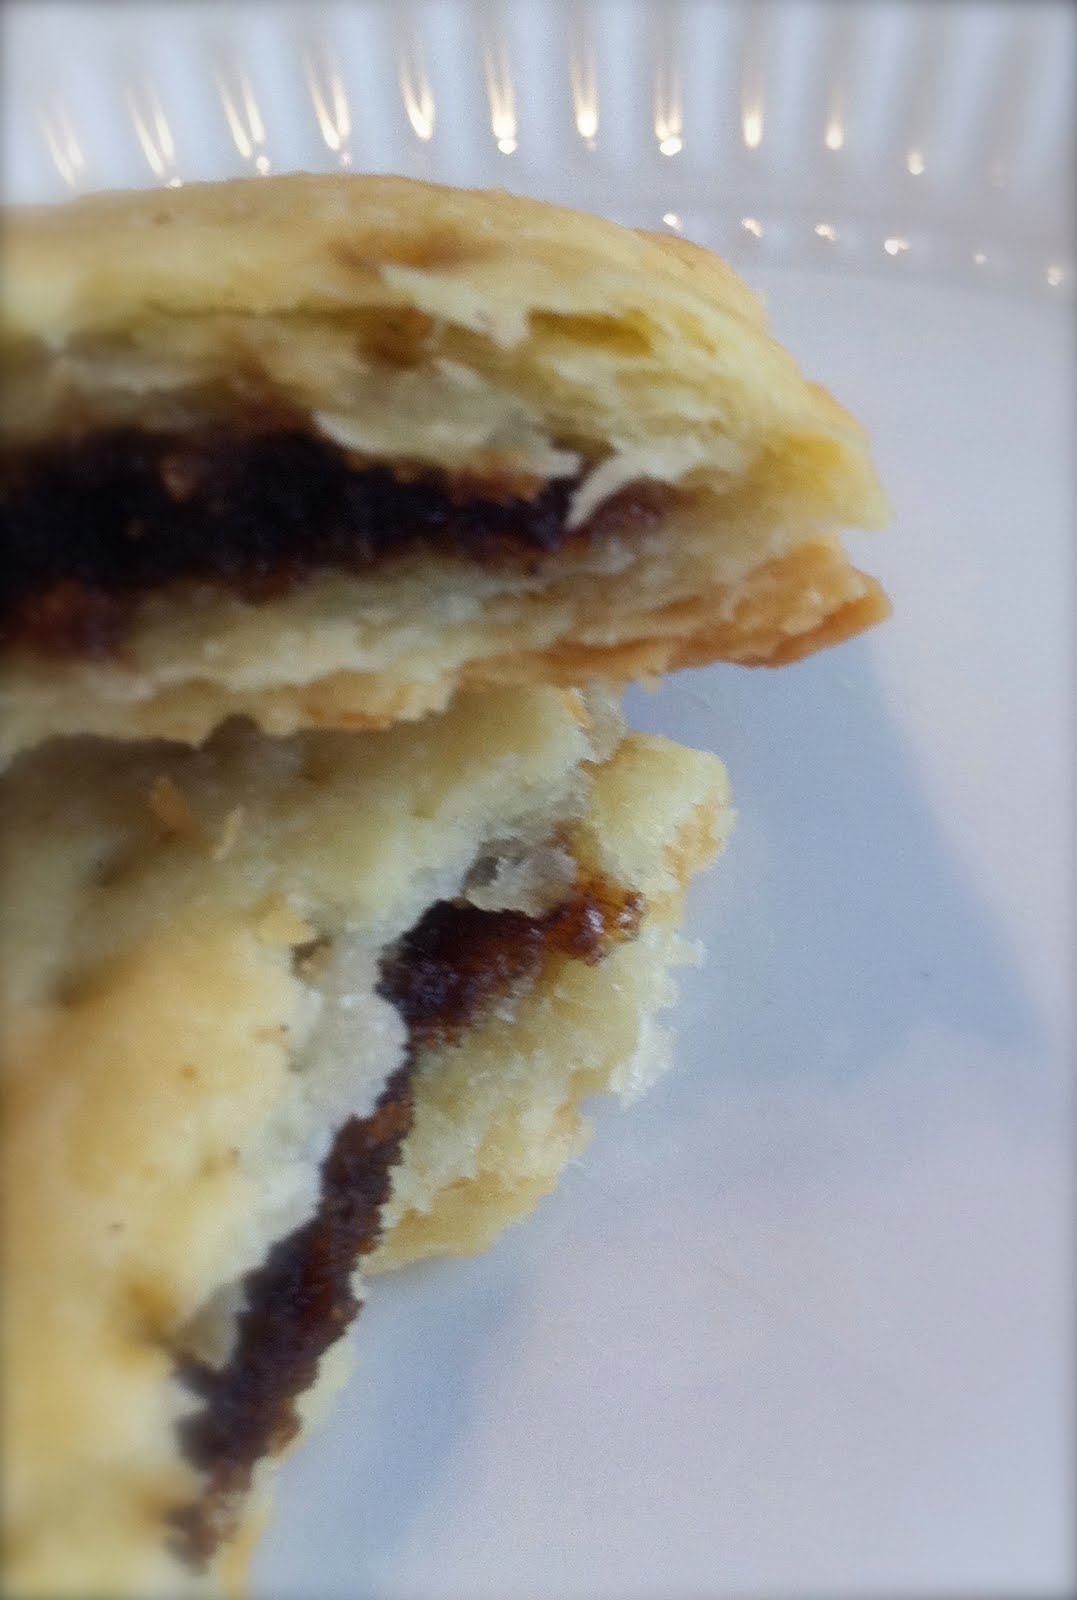
These turned out absolutely amazing.  I made cinnamon sugar pop tarts (my favorite) and Cherry pop tarts. They were a big hit with my family and boyfriend.  I would recommend eating them cold, I liked the pastry part a lot better when they were cold, but to each their own.  The pastry part was buttery and flaky and the center...well, that cinnamon sugar center sent me on a brief trip to heaven.

Homemade Pop Tarts

Pastry
2 cups (8 1/2 ounces) all-purpose flour
1 tablespoon sugar
1 teaspoon salt
1 cup (2 sticks or 8 ounces) unsalted butter, cut into pats
1 large egg
2 tablespoons (1 ounce) milk

1 additional large egg (to brush on pastry)

Cinnamon Filling (enough for 9 tarts)
1/2 cup (3 3/4 ounces) brown sugar
1 to 1 1/2 teaspoons ground cinnamon, to taste
4 teaspoons all-purpose flour
1 large egg, to brush on pastry before filling

Jam Filling
3/4 cup (8 ounces) jam
1 tablespoon cornstarch mixed with 1 tablespoon cold water


To make cinnamon filling: Whisk together the sugar, cinnamon, and flour.

To make jam filling:

1.) Mix the jam with the cornstarch/water in a small saucepan.
2.) Bring the mixture to a boil, and simmer, stirring, for 2 minutes.
3.) Remove from the heat, and set aside to cool. Use to fill the pastry tarts.

Make the dough:

1.) Whisk together the flour, sugar, and salt.

2.) Work in the butter with your fingers, pastry blender or food processor until pea-sized lumps of butter are still visible, and the mixture holds together when you squeeze it. If you’ve used a food processor, transfer the mixture to a large bowl. Whisk the first egg and milk together and stir them into the dough, mixing just until everything is cohesive, kneading briefly on a well-floured counter if necessary. *This is the easiest method, if you have a food processor, this dough will be made in no time.

3.)Divide the dough in half (approximately 8 1/4 ounces each), shape each half into a smooth rectangle, about 3×5 inches. You can roll this out immediately or wrap each half in plastic and refrigerate for up to 2 days.

Assemble the tarts:

1.) If the dough has been chilled, remove it from the refrigerator and allow it to soften and become workable, about 15 to 30 minutes.

2.) Place one piece on a lightly floured work surface, and roll it into a rectangle about 1/8″ thick, large enough that you can trim it to an even 9″ x 12″. [You can use a 9" x 13" pan, laid on top, as guidance.] Repeat with the second piece of dough. Set trimmings aside.

3.)Cut each piece of dough into thirds – you’ll form nine 3″ x 4″ rectangles.

4.) Beat the additional egg and brush it over the entire surface of the first dough. This will be the “inside” of the tart; the egg is to help glue the lid on.

5.) Place a heaping tablespoon of filling into the center of each rectangle, keeping a bare 1/2-inch perimeter around it.

6.) Place a second rectangle of dough atop the first, using your fingertips to press firmly around the pocket of filling, sealing the dough well on all sides.

7.)Press the tines of a fork all around the edge of the rectangle. Repeat with remaining tarts.

8.) Gently place the tarts on a lightly greased or parchment-lined baking sheet.

9.)  Prick the top of each tart multiple times with a fork; you want to make sure steam can escape, or the tarts will become billowy pillows rather than flat toaster pastries. Refrigerate the tarts (they don’t need to be covered) for 30 minutes, while you preheat your oven to 350°F.

Friday, August 13, 2010

Cotton Candy Cupcakes


Carnivals. Ferris Wheels. Funnel Cakes. Cotton Candy. Cupcakes.  Oh yea. Thats right, I said it...cotton candy cupcakes.  In celebration of summer and to cherish my last week of freedom until school is going to take over my life, I created this fabulous cotton candy cupcake.  Okay, I didn't really create it but sort of.  When my mom and I were on our road trip to Alabama, we stopped at for every possible reason you could imagine.  One of those stops was a Krogers and I found Jelly Belly pudding flavors, one of those being Cotton Candy.  What a fabulous idea.  Whoever thought of cotton candy pudding, thank you.  I think I love you.  The recipe is about as simple as can be but they look and taste fabulous.  They kind of make me happy just looking at them. Here's what you do:

1.) Take a strawberry cake mix, follow instructions on the box for cupcakes. I used Duncan Hines.  I got 23 cupcakes.  Let them cool.

2.) Using the cone method (check out my blueberries and cream cupcake post to see the method) fill the strawberry cupcakes with about a tablespoon of pudding each.  Put the tops back on.

3.) Frost with whipped icing.  I used jarred icing because I was lazy.  I used the whipped kind which turned out perfect because its not as sweet as regular frosting.

4.) Decorate them pretty.
Wednesday, July 14, 2010

The Best Easy Banana Bread recipe with Cinnamon Swirls


I'm not gonna lie, I made this Cinnamon Swirl Banana Bread months ago and I have been withholding it from everybody.  Yea, I knew it was wrong, but I did it anyway.  This is seriously the best banana bread I have ever had.  It even beats out my mom's banana cake...but don't tell her I said that.  The best part about it? It's damn easy to make.  It honestly took me about 10 minutes to throw it all together, and then you just throw her in the oven and let her bake.  Done and done.


My analysis on the situation is that I think the coating of cinnamon and sugar on the top sort of hardens and forms a crust which in turn holds the moisture in and makes it cake-like and not so much bread-like.  Bread to me means dry and bland.  Cake is moist and sweet and delicious.  Throw some cinnamon and sugar in there yet and I think we found ourselves a winner.


Anyway, I got this recipe from Lovin' The Oven who I think got it from somewhere else.  Please, keep sharing.  This recipe deserves to be popular.


cinnamon swirl.
1/3 cup granulated sugar
1 TBSP Cinnamon

1.) Preheat over to 350 degrees F.
2.) Combine cinnamon and sugar together; set aside.
3.) Generously flour and butter a 9x5 bread pan; set aside.
bread.

3-4 over-ripe bananas (mine were huge, so I only used 2)


Now that's a big banana. (Heh, I couldn't resist)


1 cup sugar
1 egg (beaten)
1/3 cup melted butter
1 tsp vanilla
1 tsp baking soda
dash of salt
1 1/2 cups flour

4.) In an electric mixer, beat the first 5 ingredients together.  
5.) Sprinkle the baking soda and salt over the top of the batter; mix.
6.) Slowly add the flour; beat until it is just incorporated, don’t over mix here.
7.) Pour half of the batter into the prepared pan
8.) Sprinkle half the cinnamon/sugar mixture over the batter.
9.) Pour the other half of the batter over the cinnamon/sugar mixture.
10.) Sprinkle the remaining cinnamon/sugar mixture over the the top of the batter.
11.) Bake for 50-60 minutes, or until you can insert  a toothpick into the center and comes out clean.


Monday, July 12, 2010

Lancaster County Wet Bottom Shoo Fly Pie


I'm celebrating my roots today.  Well...okay, not really.  My boyfriend has been asking for a shoo fly pie so I finally buckled down and made one.  Shoo Fly Pie? What the heck is that? Well, basically, it is molasses pie.  It's got a gooey bottom (i.e., wet bottom...um, how crude, by the way) and a crumby top (hahaha).  It is a very traditional Pennsylvania Dutch dessert.  Apparently, when the first of the Mennonites and Amish settled in Pennsylvania, they could only bring items with them that were non-perishable and that could survive the long boat trip (makes sense).  These staples were items like brown sugar, molasses, flour, lard, salt and spices.  Hence, the women had to make due with what they had so they concocted this deliciousness called a Shoo Fly Pie.  The origin of the name is not 100% known but the rumor is that they had outdoor ovens and because the molasses in the pie was so sticky and sweet, it attracted flies.  Now how is that for a history lesson?  Don't say I never taught you anything.


I found this recipe in my Grandmother's recipe index so authentic is definitely what you are getting here.

crumb topping.
1 cup flour
1/2 cup light brown sugar
1/4 cup shortening
1/2 tsp. salt


filling.
1 cup boiling water
1 cup light molasses (I used dark because...I have no idea what light molasses is)
1 tsp. baking soda
1 egg, beaten


  1. Preheat oven to 350 degrees F.
  2. Mix crumb topping ingredients together, using a pastry blender, until very fine. Set aside. 
  3. Blend together water, molasses and baking soda.
  4. Mix in egg.
  5. Pour into a 9-inch unbaked pie shell* (they say to use a deep dish pie crust here, but I didn't. Maybe that is why my crumb topping was so crumby).
  6. Using a large spoon, mix the crumb mixture well into the molasses filling
  7. Bake 35-40 minutes.
*Okay, so here's the deal.  It is really easy to make pie crust and it tastes sooo much better than pre-made.  But guess what, I was feeling lazy when I baked this and I didn't feel like getting depressed because I can never crimp my edges nicely.  So I did it.  I used a pre-made.  Yea, I knew it was wrong but I did it anyway.  And I liked it. Um...and it looked a lot prettier than mine ever does.  Didn't taste as good though. 


Sunday, July 4, 2010

Easy Fruit and Cheese Danish Recipe


So the fat kid in me was really craving a cheese danish the past couple of days.  I'm not really sure why, I rarely eat pastries but I couldn't stop thinking about cheese danishes for at least 3 days...ha.  I don't really know of any good bakeries near me and I had some Pillsbury Croissant dough in my fridge, so I decided to make them.  This is a pretty dangerous because you only need 3 ingredients and 11 minutes and they are really good.  The best part about it is that you can make them any flavor you want really, because I just put jam in the center for the flavoring.  I used rasberry jam.  My grandmother made it for me and I don't otherwise eat jam but it turned out to be the perfect ingredient for these danishes.

rasberry cream cheese danishes.
pillsbury canned instant croissant dough
1 tsp jam (your choice of flavor)
1 tsp cream cheese (I used 1/3 less fat but not like it matters, there isn't really any way these are low fat)


  1. Break open can of croissant dough and unroll.
  2. Tear along dotted lines into 4 squares (2 croissant triangles per square)
  3. Place 1 tsp of jam and 1 tsp of cream cheese in the center of each square.
  4. Fold four corners of each square into center and pinch to close.
  5. Bake in oven according to directions on can.
Thats it. You're done and it and looks like you spent tons of time on these put you're really just a cheater.  But nobody needs to know that. 


Saturday, July 3, 2010

Baby Shower Cake Pops


So my oldest sister is pregnant with her first daughter and obviously my soon to be niece. I am so incredibly stoked for her and to meet the new baby Hadlow. Her best friend and sister-in-law set up a beautiful baby shower in New York City so I decided to contribute and try my hand at cake pops again.  They turned out MUCH better than the first time.  This time instead of using an entire can of frosting, I only used about 3/4 of a can.  I put the melted chocolate in a pastry bag with a thin tip to decorate and they turned out pretty awesome...if I do say so myself.


The baby shower gang.  My sister is so cute...you can barely tell she is preggers:


On that note, I know I've been MIA for a while but I've been going through some major changes lately.  I quit my very stable, well paying job in Washington, D.C. to go back to school for Nursing.  I moved up to Altoona, Pa which is quite the change, let me tell you.  I don't know anybody in this town and I am surrounded by mountains like I'm trapped in a valley of slightly odd people.  The program is 16 months and I will have my Bachelors in Nursing and then it is off to school again for my masters so I can ultimately become a Nurse Practitioner.  I'm looking forward to my new niece and there are a lot of exciting changes to come so forgive me if my entries take a vacation for a while, I'll do my best.  
Thursday, June 10, 2010

Chocolate Peanut Butter Rice Krispy Bars


Ah Rice Krispy Treats...a pastime childhood favorite for pretty much everybody I'd venture to say.  I remember making Rice Krispy Treats with my Mom when I was younger.  I used to lick the marshmallow off the spoon, all coated in sticky sugar and butter...yum. Well my favorite 'Baked' boys came up with a delectable adult version of the Rice Krispy Treat.  They start with a layer of Rice Krispy, stuck together with a type of simple syrup rather than marshmallow, however; I imagine you could use marshmallow in place of the syrup and it would still taste amazing.  The Krispy layer is topped with a layer of peanut butter chocolate mixture and then topped off with a layer of dark chocolate...UM, can you say heaven? I can.  This treat is amazing but very very rich...a little goes a long way so make sure not to cut the slices too big.

rice krispy layer.
1 3/4 cups Rice Krispys
1/4 cup sugar
3 tablespoons light corn syrup
3 tablespoons unsalted butter

chocolate peanut butter layer.
5 oz good-quality milk chocolate, coarsely chopped (I used Ghiradelli milk chocolate chips)
1 cup creamy peanut butter

chocolate topping.
3 oz dark chocolate (60-72% cacao), coarsely chopped (I used Ghiradelli dark chocolate chips)
1/2 teaspoon light corn syrup
4 tablespoons (1/2 stick) unsalted butter

  1. Lightly spray a the bottom and sides of an 8-inch square baking pan with cooking spray.
  2. Measure cereal into a large bowl and set aside.
  3. Pour 1/4 cup water into a small saucepan.  Add the sugar and corn syrup and use and mix until combined. 
  4. Cook over medium-high heat and bring to a boil; cook until the mixture reaches the soft ball stage (235 degrees F).
  5. Remove from the heat, stir in the butter, and pour the mixture over the cereal. 
  6. Stir until the cereal is thoroughly coated, then pour into prepared pan
  7. Press the mixture into the bottom of the pan using your hands. *My hands didn't seem to do so well at this, the mixture kept sticking to my fingers. So I coated the back of a large stirring spoon with some cooking spray and pressed the mixture using that. It worked so much better.  Do not press up the sides.     
  8. Let the crust cool to room temperature while you make the next layer. 
  9. For the chocolate peanut butter mixture: Stir together the chocolate and the peanut butter in a large nonreactive metal bowl.
  10. Set the bowl over a saucepan of simmering water and cook, stirring with a rubber spatula until the mixture is smooth.
  11. Remove the bowl from the pan and stir for about 30 seconds to cool slightly.  Pour the mixture over the cooled Krispy mixture. Let chill in the refrigerator for 1 hour or until the top layer hardens (I don' t think it took that long, but I can't remember exactly how long it took; a lot of help I am huh?).
  12.  Make the chocolate topping: In a large nonreactive metal bowl, combine the chocolate, corn syrup, and butter (yum).
  13. Set the bowl over a saucepan of simmering water and cook, stirring with a rubber spatula, until the mixture is completely smooth.  Remove the bowl from the pan and stir for 30 seconds to cool slightly.
  14. Pour the mixture over the chilled milk chocolate peanut butter layer and spread into an even layer.
  15. Put the pan in the refrigerator for 1 hour or until the topping hardens.
  16. Cut into 9 squares.  The bars can be stored in the refrigerator, covered tightly, for up to 4 days. 


Thursday, June 3, 2010

Cinnamon Scones with Pecan and Walnut Streusal


I was looking everywhere for a cinnamon scone recipe the past few weeks and was having a really hard time finding a decent recipe.  Its so weird, you'd think cinnamon scones would be a popular item, but apparently they are not.  I'm not really a fan of scones, I think they are too dry and I'd much rather eat a donut but my mom wanted them for the trip down to Alabama last weekend and cinnamon was the only ingredient that I could think of that would make me enjoy the scone.  I ended up creating my own recipe since I couldn't find one that I was happy with and man did it turn out good.  It honestly tasted like a cake donut and it wasn't dry at all.  Minus the frying part though, it probably wasn't much healther. 


cinnamon scone.
2 3/4 cup all-purpose flour
3 1/2 teaspoons baking powder
1/8 teaspoon cream of tartar
1/2 teaspoon salt
2 teaspoons cinnamon
1/4 teaspoon nutmeg
1/3 cup granulated sugar
1 stick (1/4 lb) chilled butter, cut into chunks
1/2 cup chopped walnuts (toasted)
1/2 cup chopped pecans (toasted)
2/3 cup heavy whipping cream
3 teaspoons vanilla extract
2 large eggs

walnut pecan streusal topping.
3/4 all-purpose flour
1/2 teaspoon ground cinnamon
1/3 cup plus 3 tablespoons firmly packed light brown sugar
6 tablespoons chilled unsalted butter, cut into chunks
3/4 teaspoon pure vanilla extract
1/2 cup chopped walnuts (toasted)
1/2 cup chopped pecans (toasted)
                           
                                     ready for the oven.
  1. Preheat oven to 400 degrees F
  2. Line 2 large cookie sheets with parchment paper
  3.  Sift dry ingredients (up to and including sugar) in the bowl of your food processor or in a medium sized bowl if you don't have a food processor
  4. Drop in chunks of butter and pulse until fully combined or you can use a pastry blender or a fork and mix by hand if you don't have a food processor. 
  5. Add the chopped nuts to the mixture and combine. 
  6. In a large bowl, whisk cream, eggs and vanilla.
  7. Add the flour mixture and stir until a soft dough forms (I started this with a spoon and then finished with my hands).
  8. Turn the dough out onto a lightly floured surface and knead for about 1 minute.  If the dough seems to sticky, add more flour as needed. 
  9. Pat the dough into 2 equally sized round disks (should be about 3/4" thick) and cut like a pie into wedges (I cut mine into 5 wedges for rather large scones).   
  10. Make the Streusal:
    1. Combine first 4 ingredients in the bowl of a food processor 
    2. Add butter chunks and vanilla; pulse until small clumps form
    3. Mix in toasted nuts
  11. Press a small handful of streusal onto the top of each unbaked scone
  12. Place scones on baking sheet and bake at 400 degrees F for 13-15 minutes.  The scones should almost look like they are not done.  They should be just slightly golden on the bottom edges.  Insert a knife or toothpick into the scone, if it comes out clean, they are finished.
 

Blog Template by YummyLolly.com